Space Planner Help Center
Step by step guides to walk you through our space planner.
If you prefer a one-on-one demo, please do not hesitate to reach out to your personal Account Executive.
Find the help topic you are looking for below:
Creating Your Plan
In this section you will learn how to start your plan, how to select a venue's floor plan or start with a blank square room and how to start adding products to your plan.
How to Start
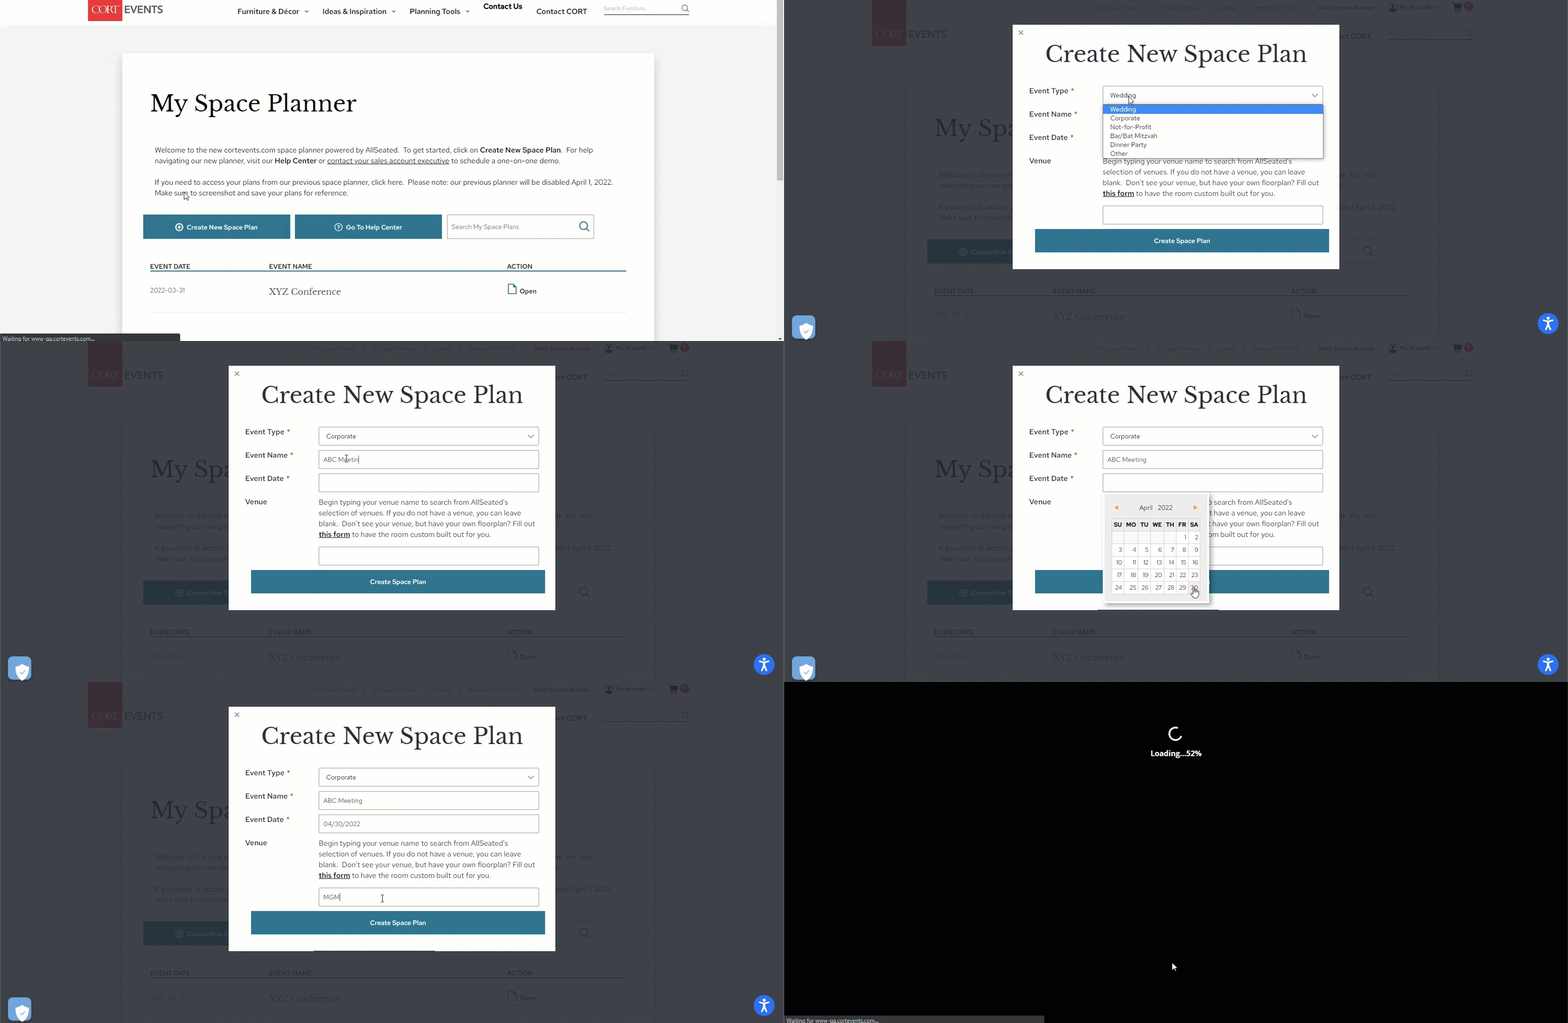
1. Make sure you are logged in with your cortevents.com account. If you do not have one, you can create one here.
2. Click on My Space Planner at the top of the page.
3. Click on Create New Space Plan.
4. Fill out event details.
5. Search for your venue and select from the list of results. If you do not have a venue yet* or do not see it in the search results, leave field blank and proceed to next step.
6. Click on Create Space Plan.
7. You will now be redirected to our space planner powered by AllSeated.
*You can add a venue later or submit your own floorplan in the planner's Details tab.

Selecting a Floor Plan
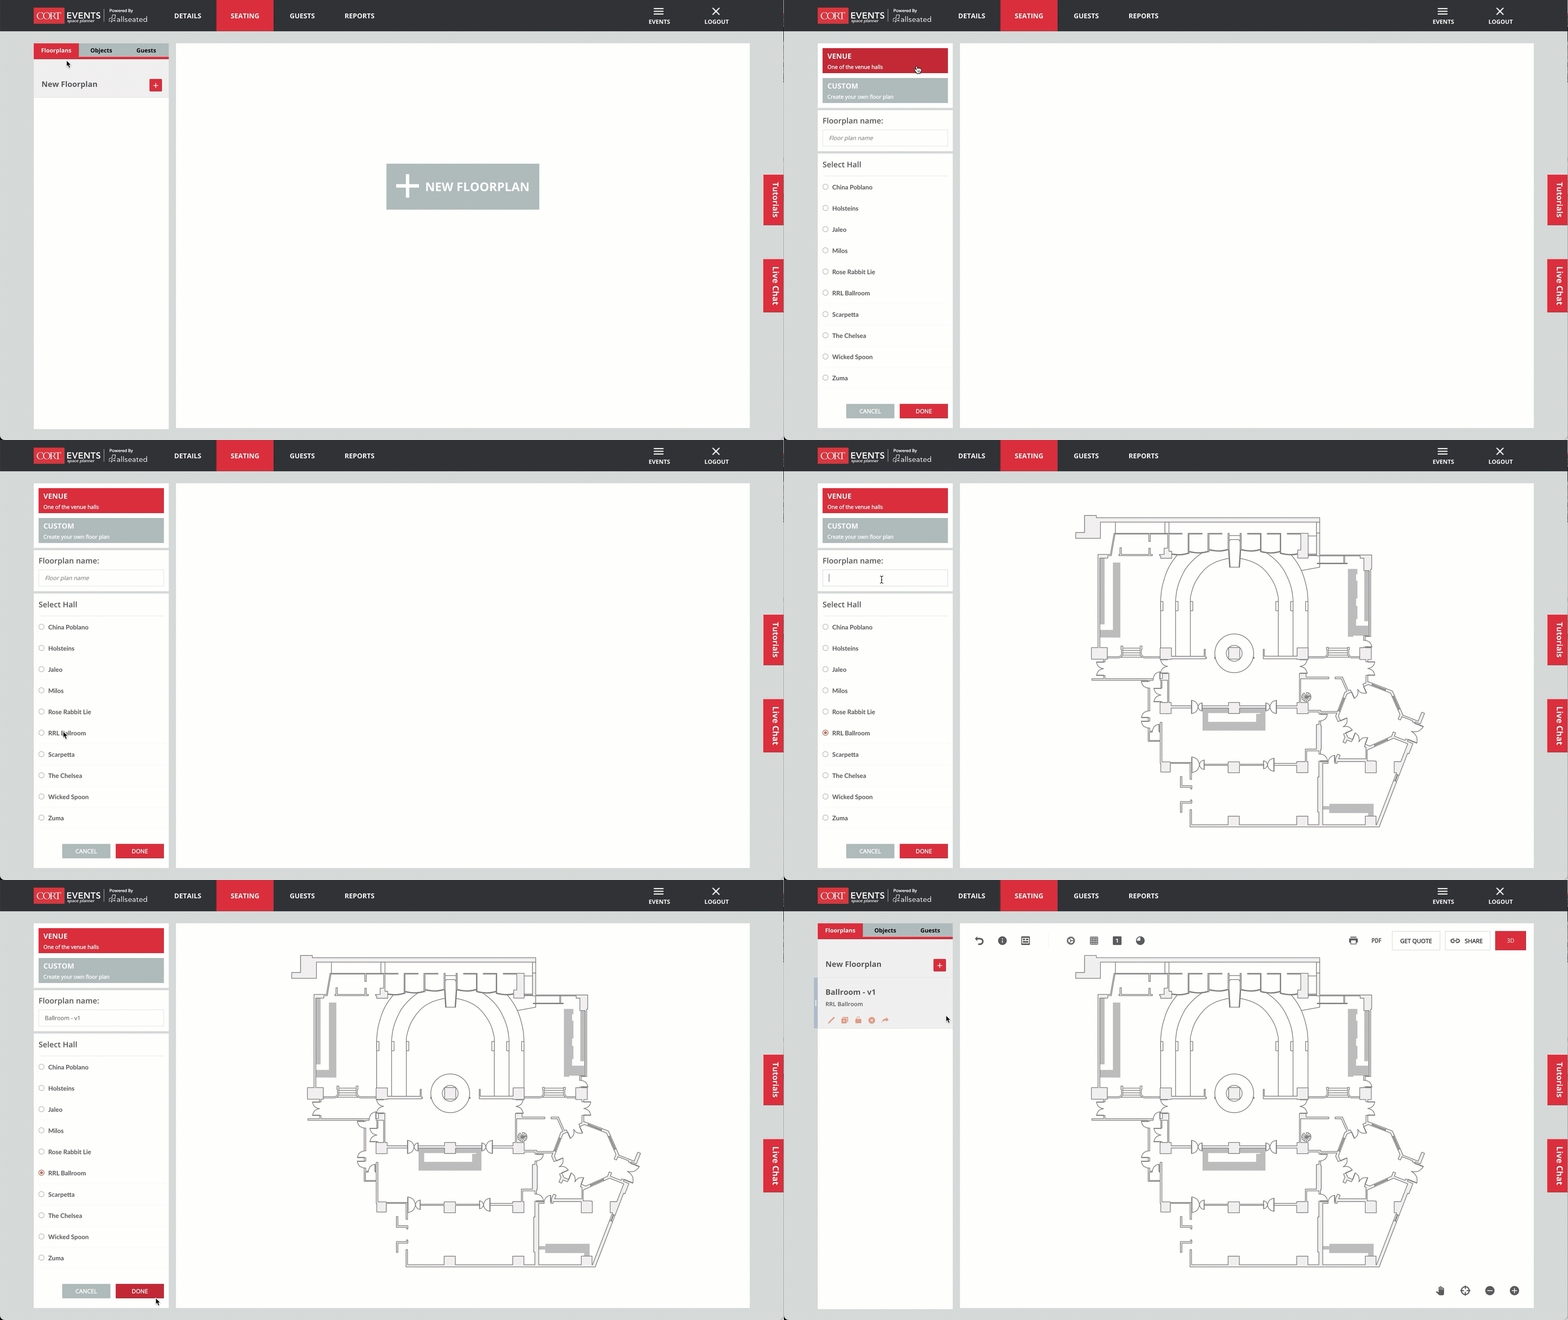
1. Click on New Floorplan.
If you selected a venue:
2. Click on Venue. The available floor plans for that venue will be listed.
3. Select the floor plan you want to use.
4. Name your Floor Plan.
5. Click on Done.

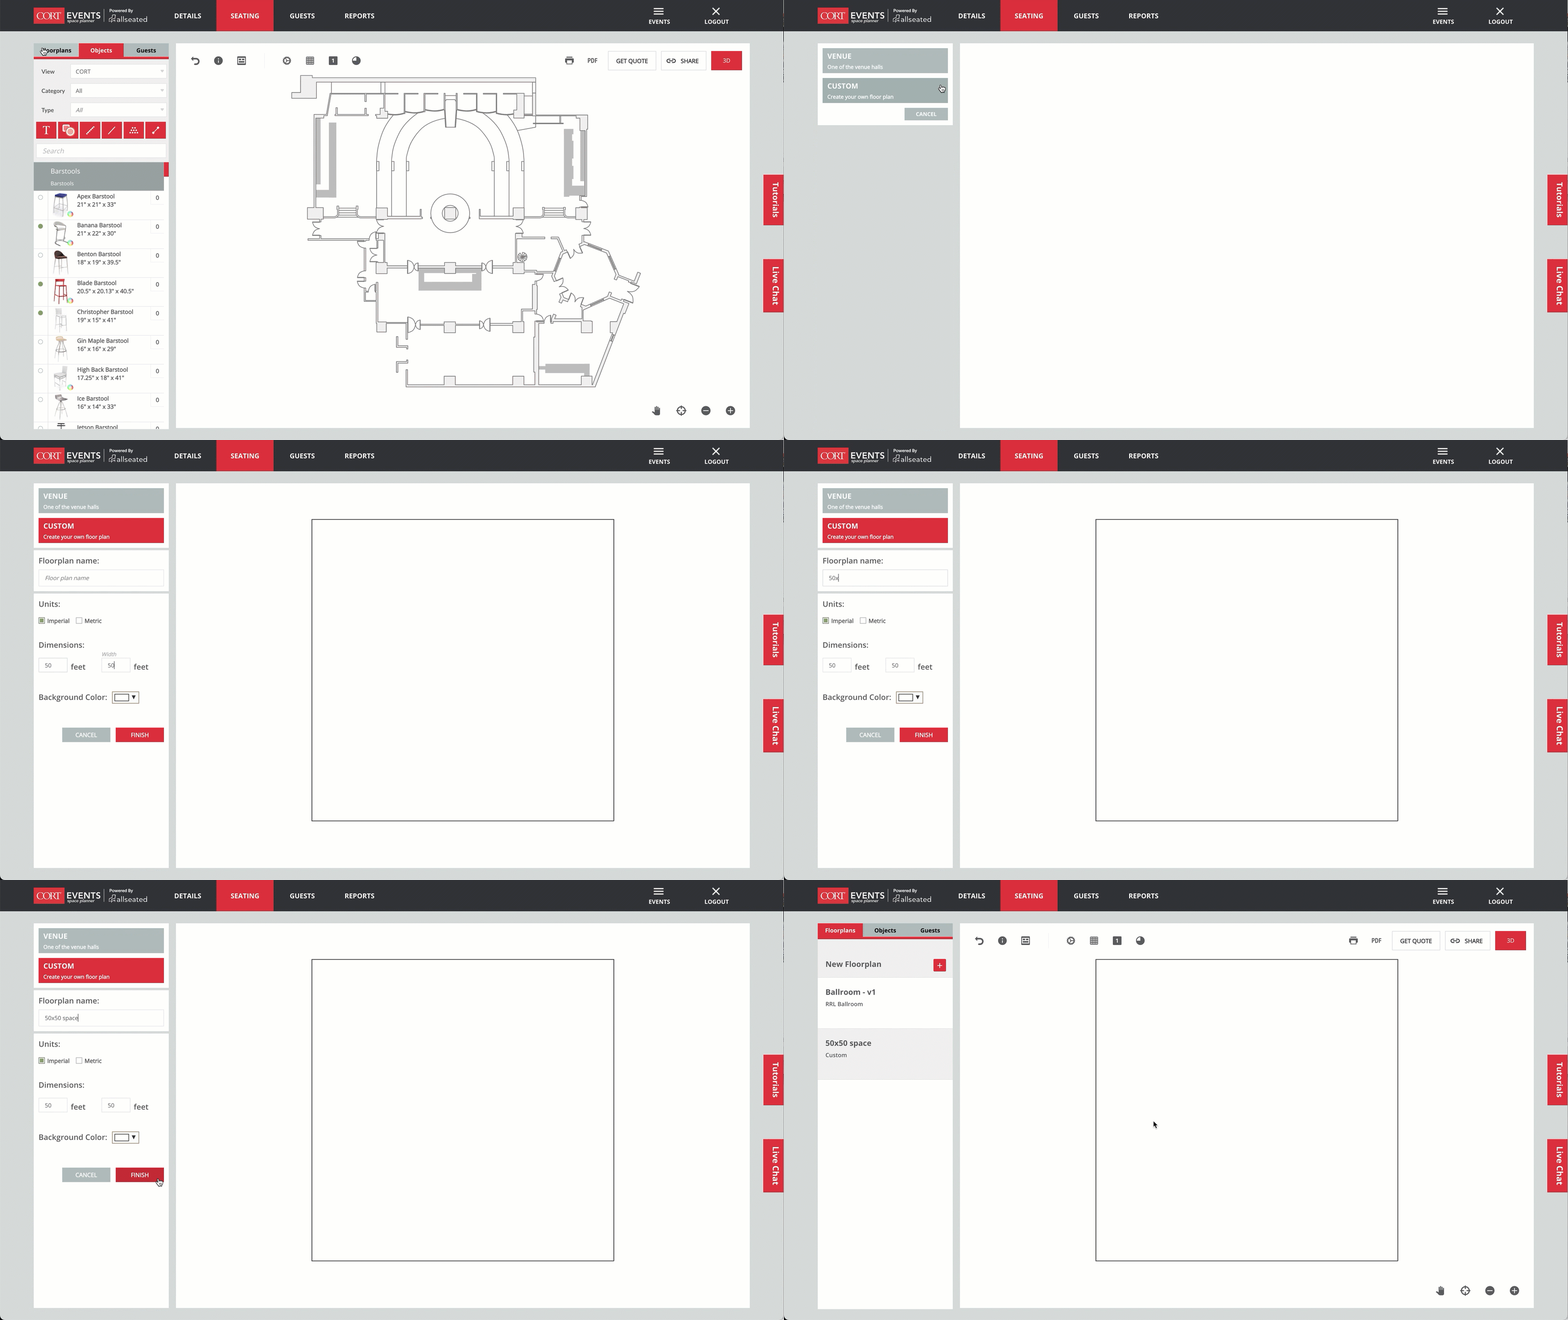
If you did not select a venue*:
2. Click on Custom.
3. Enter your room's dimensions.
4. Name your Floor Plan.
5. Click on Done.
*You can add or change your venue by clicking on the Details tab.

Adding Products to Plan
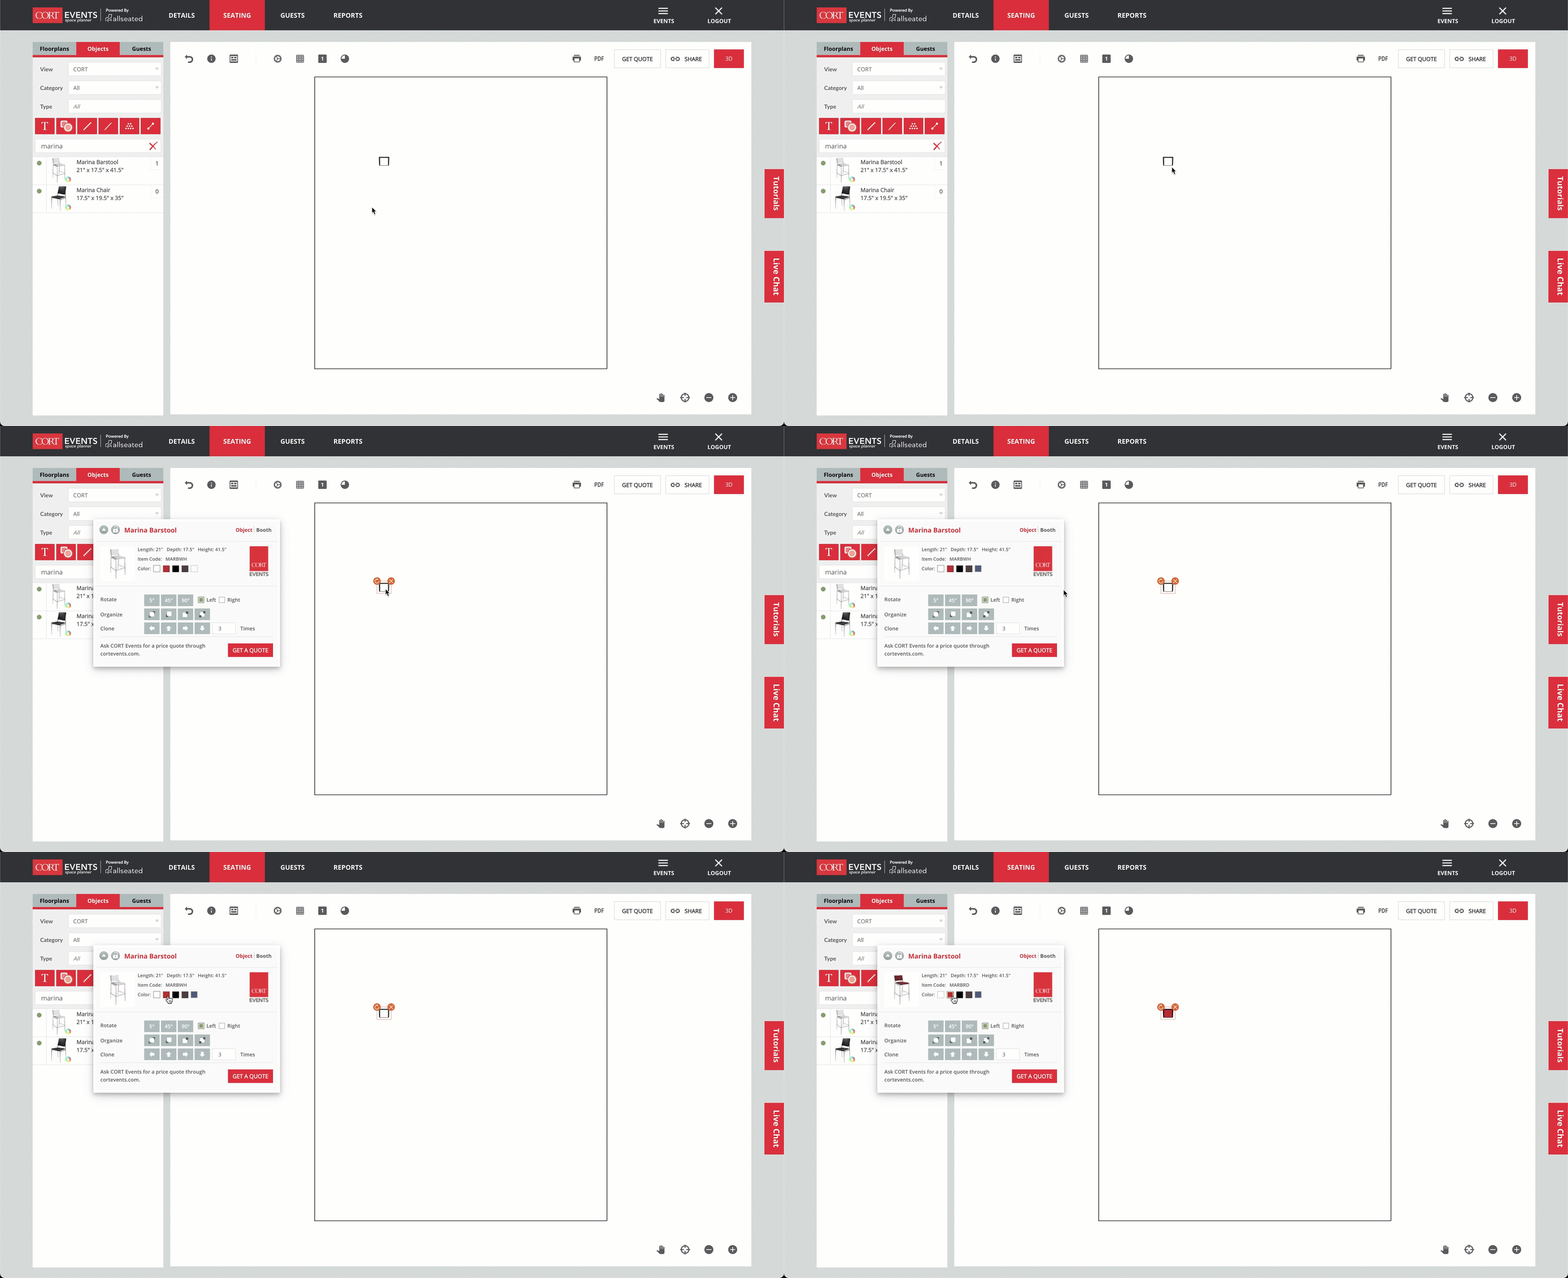
1. In the Seating tab, click on Objects in left side menu.
2. Search by name or browse through categories to find a product.
3. Click on the product, move your cursor over to the floor plan and click again to drop in place.
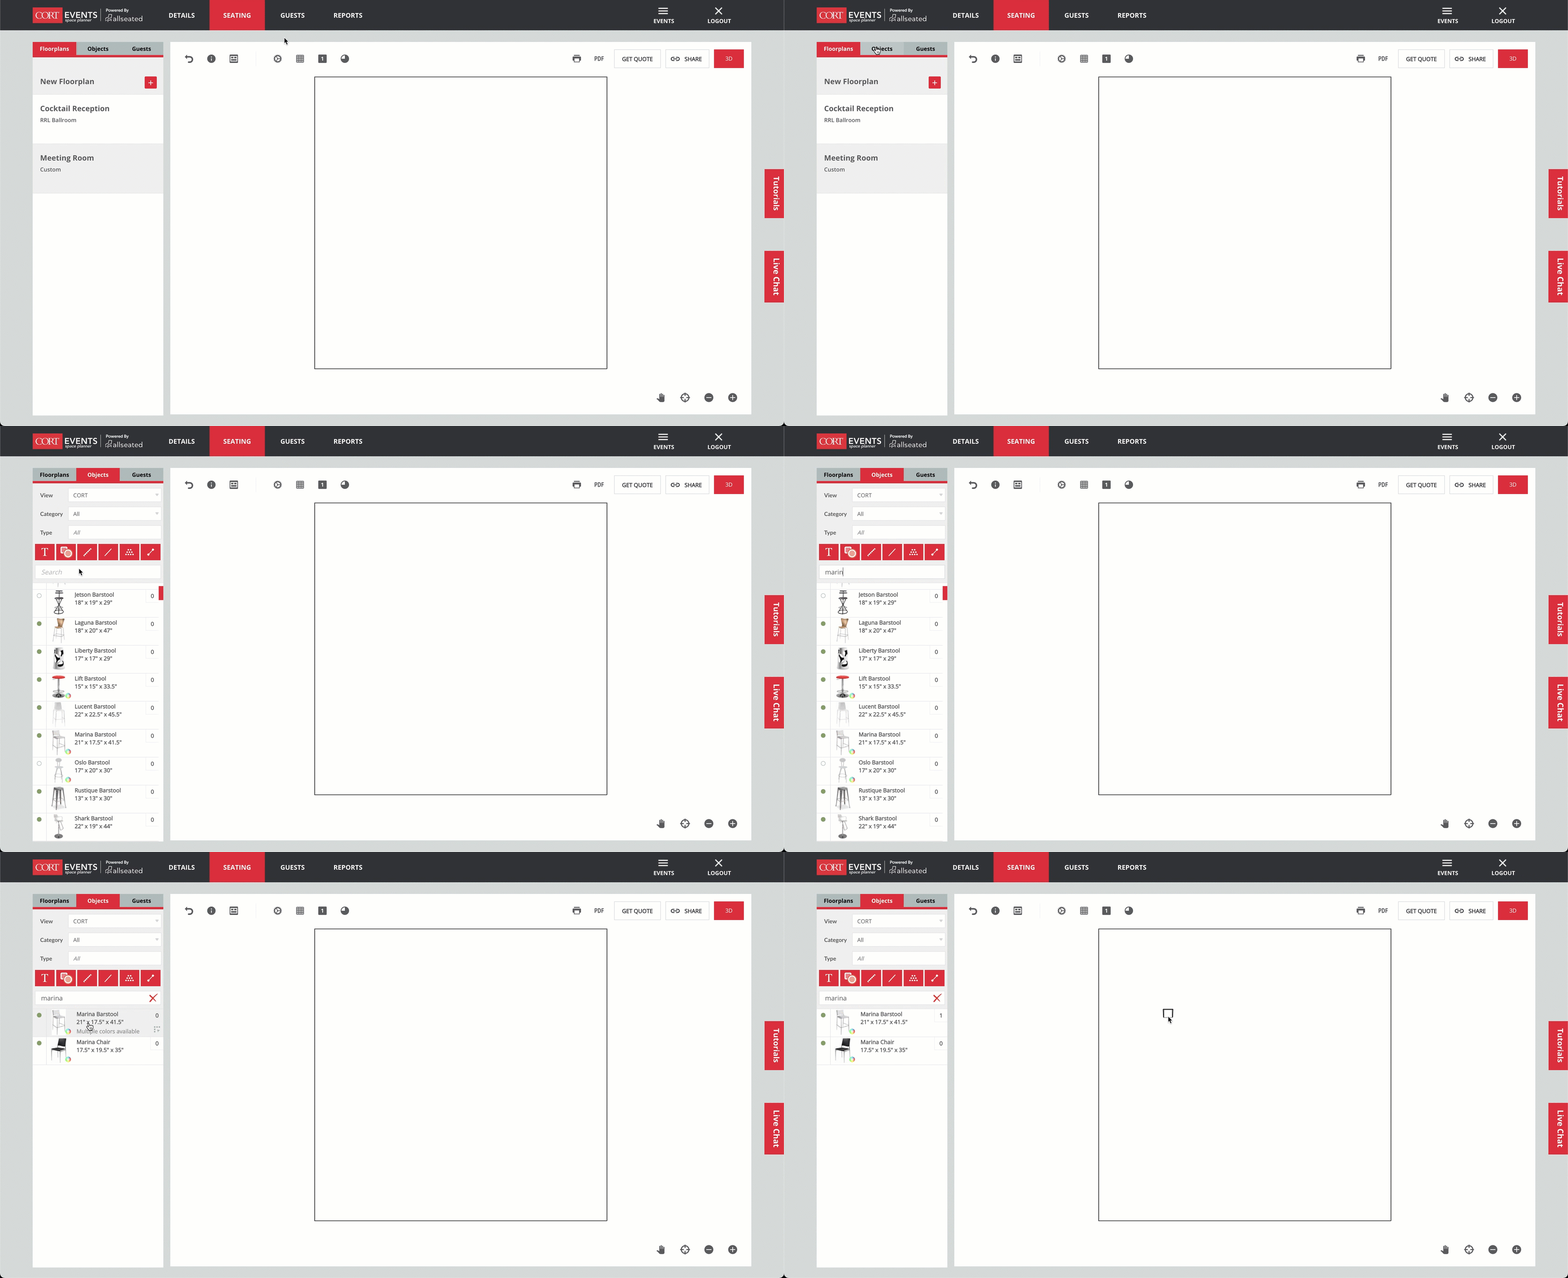

4. Click on the product in the plan to open the product menu. From here, you can choose a color (if available), view product details, rotate and clone.

Designing Your Plan
In this section you will learn how to use the object tools to clone products, align and space products, group products, use auto layouts to fill large spaces and how to view and navigate your plan in 3D.
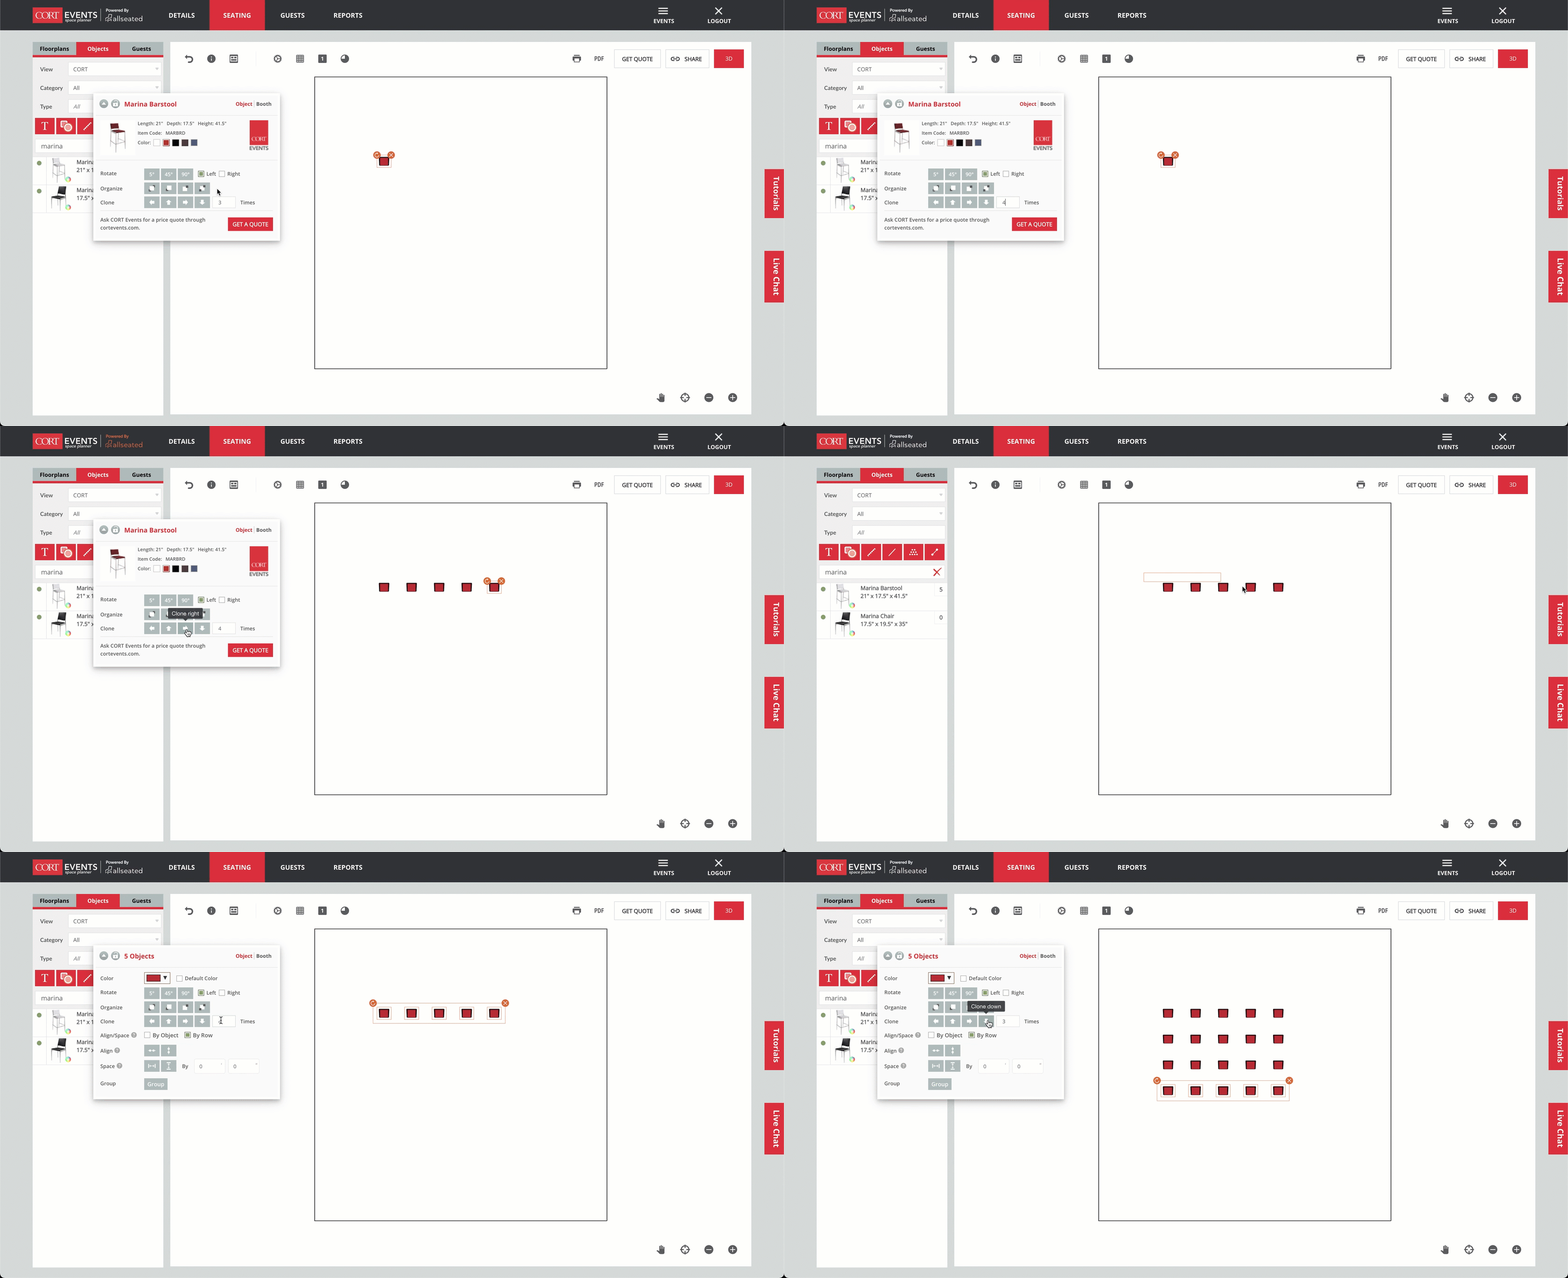
Cloning Products
1. Select product to open product menu.
2. Next to Clone, enter how many times you want to clone the product.
3. Choose which direction you want products cloned.

Aligning and Spacing Products
1. Select products you want to align/space.
2. Next to Align/Space, click on By Object*.
3. Next to Align, choose how you want your products aligned to each other (to top, bottom, middle, etc).
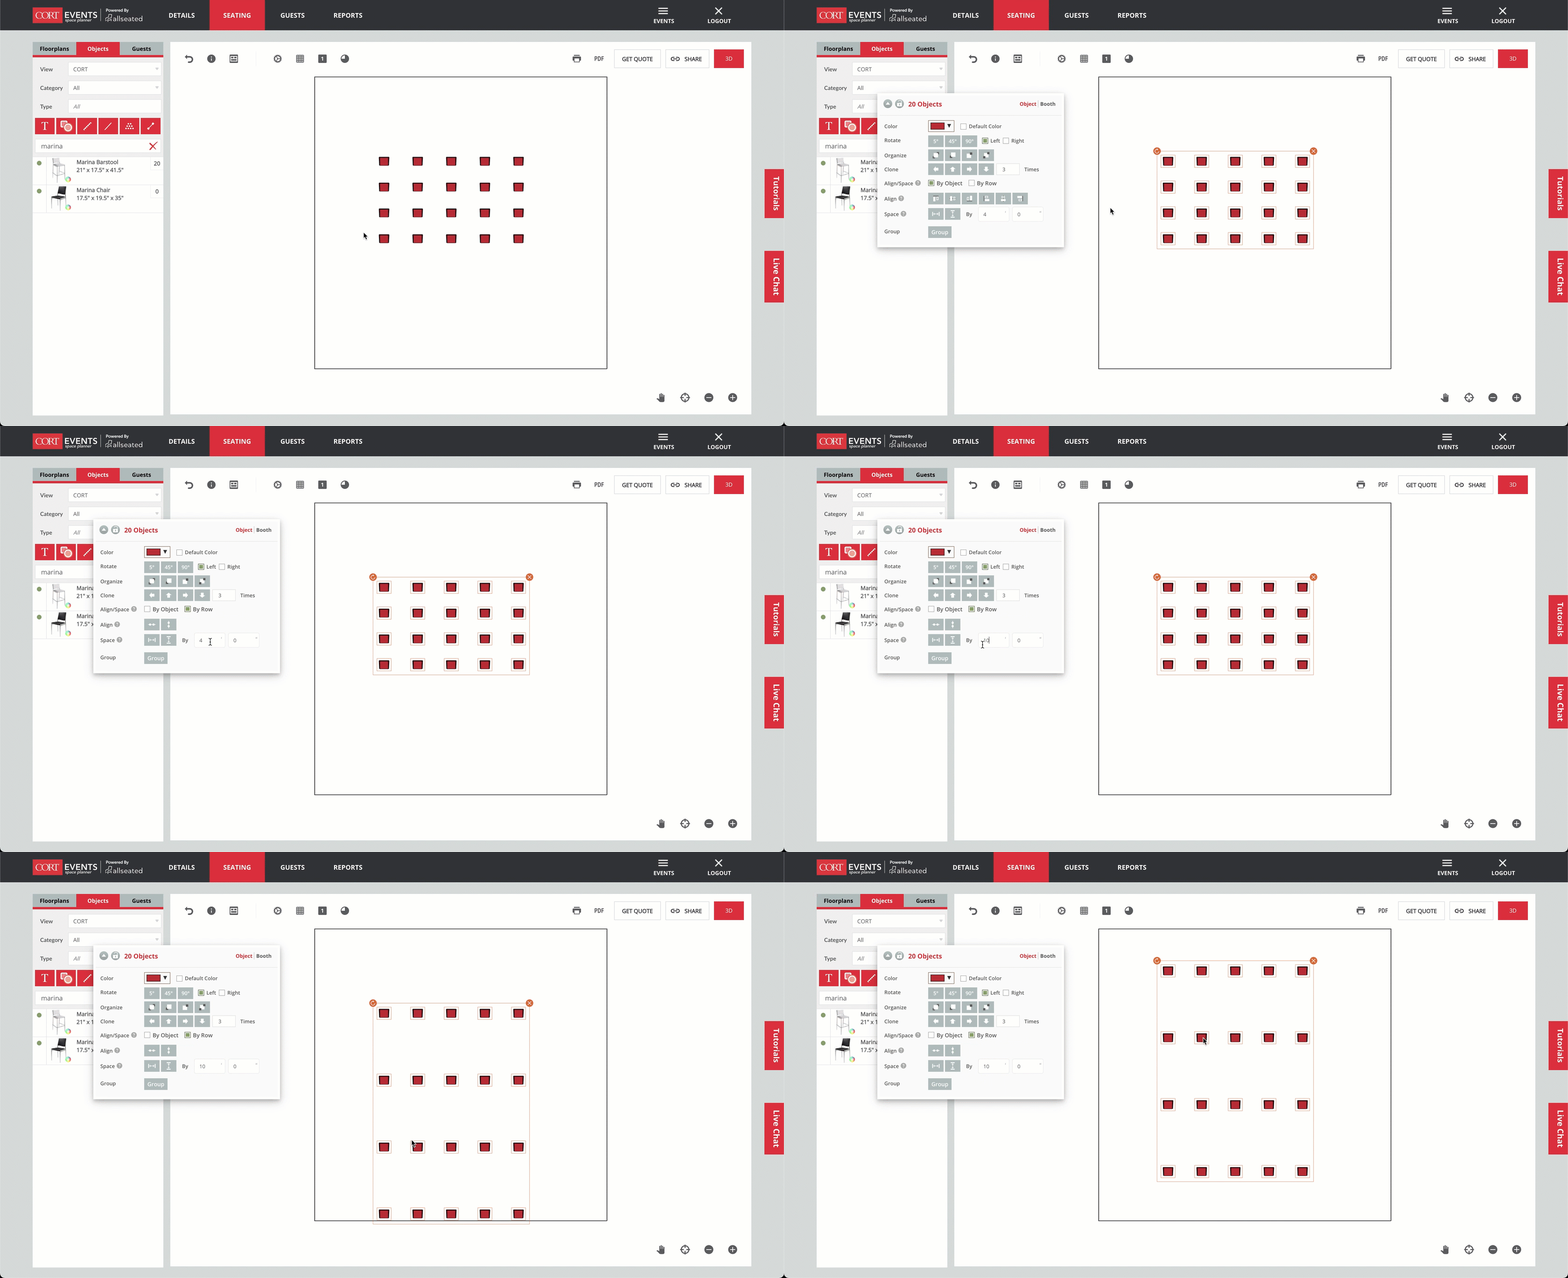
4. Next to Space, enter in the distance you want between each product.
5. Choose how you want them spaced.
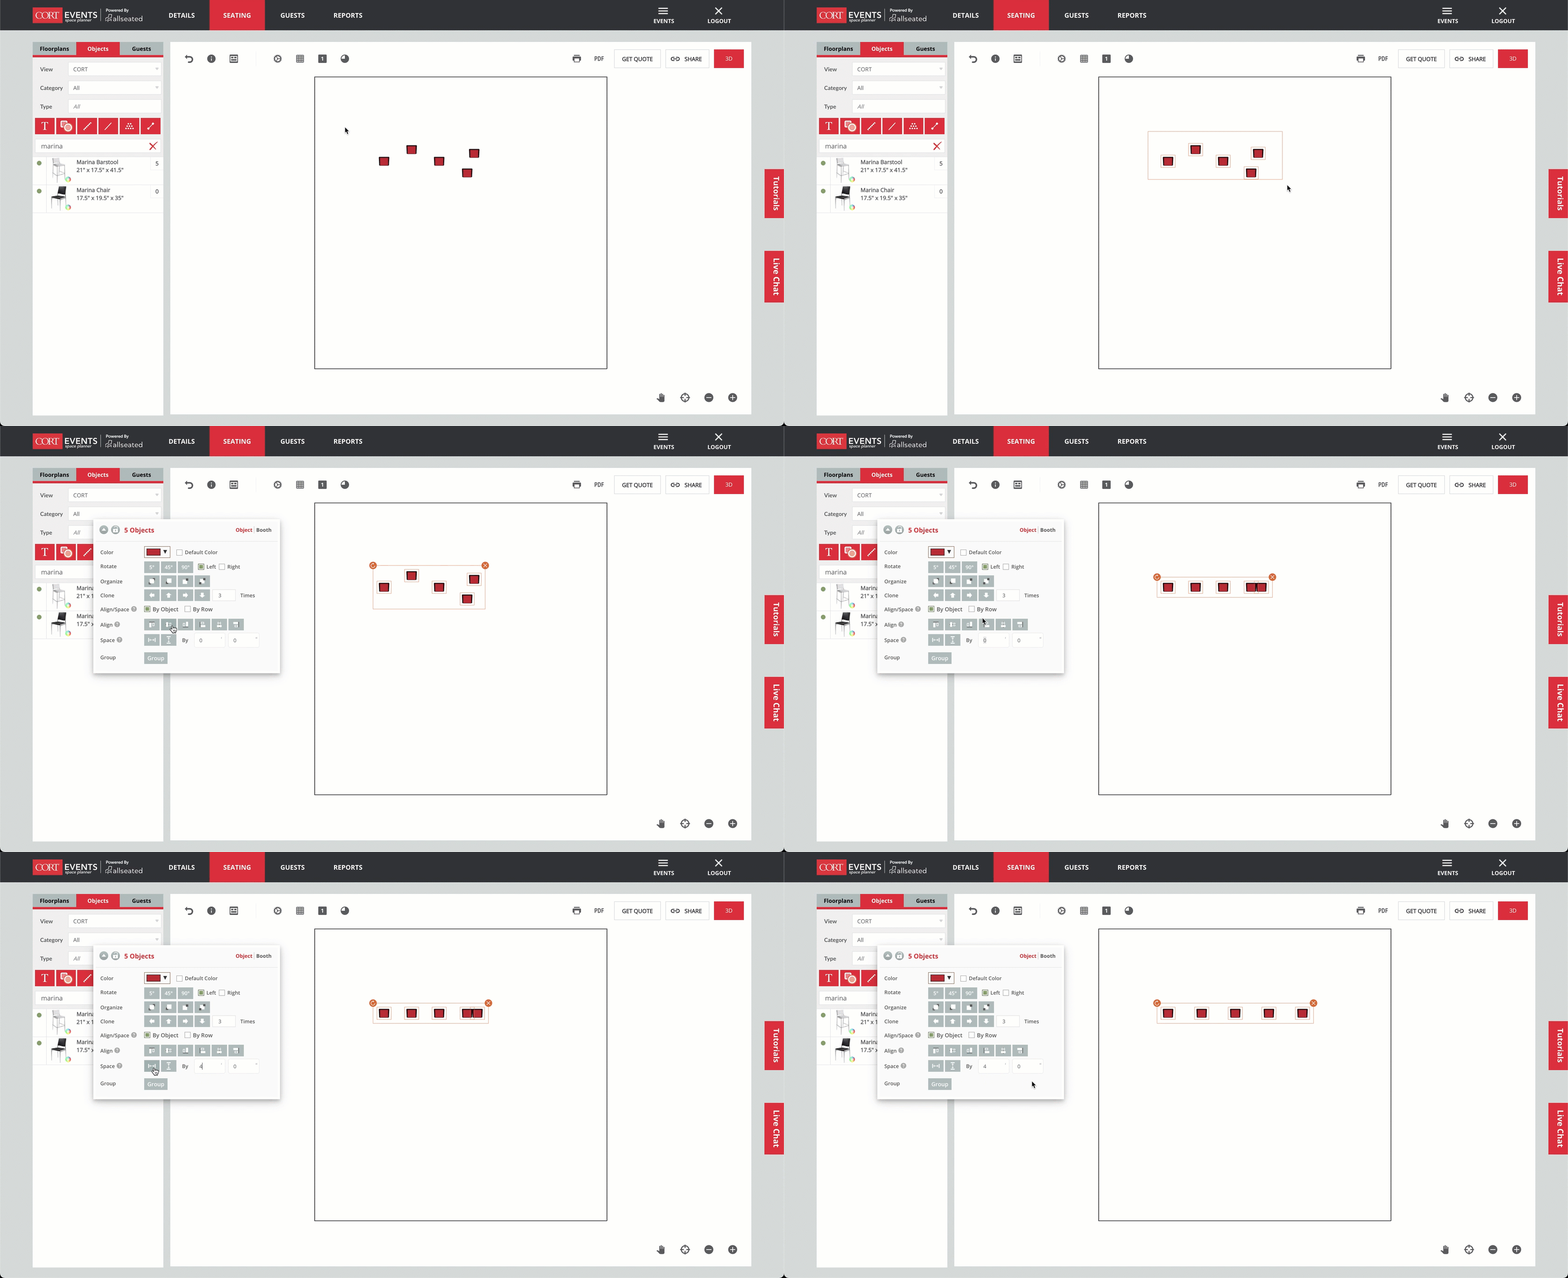

*Choose By Row if you want to align/space between rows of products.

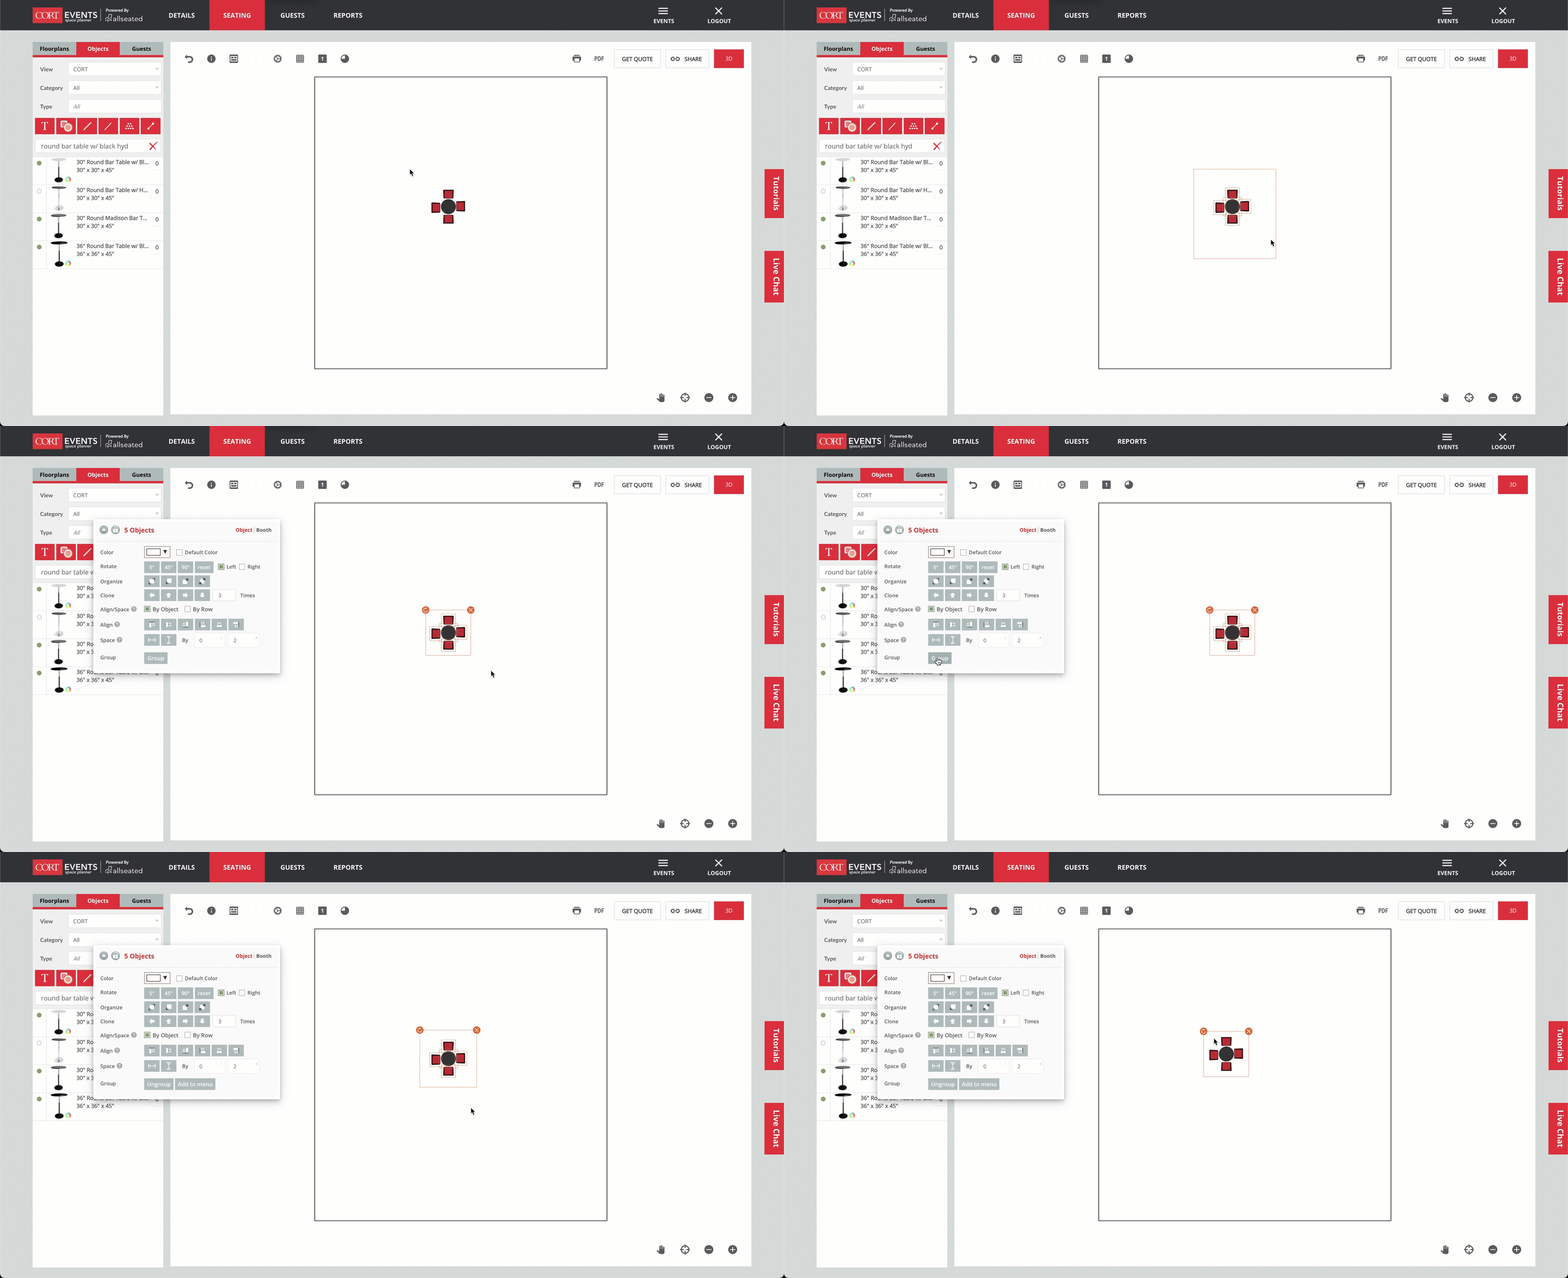
Grouping Products
1. Select the products in your plan that you want to group together.
2. In the product menu that opened, click on Group.
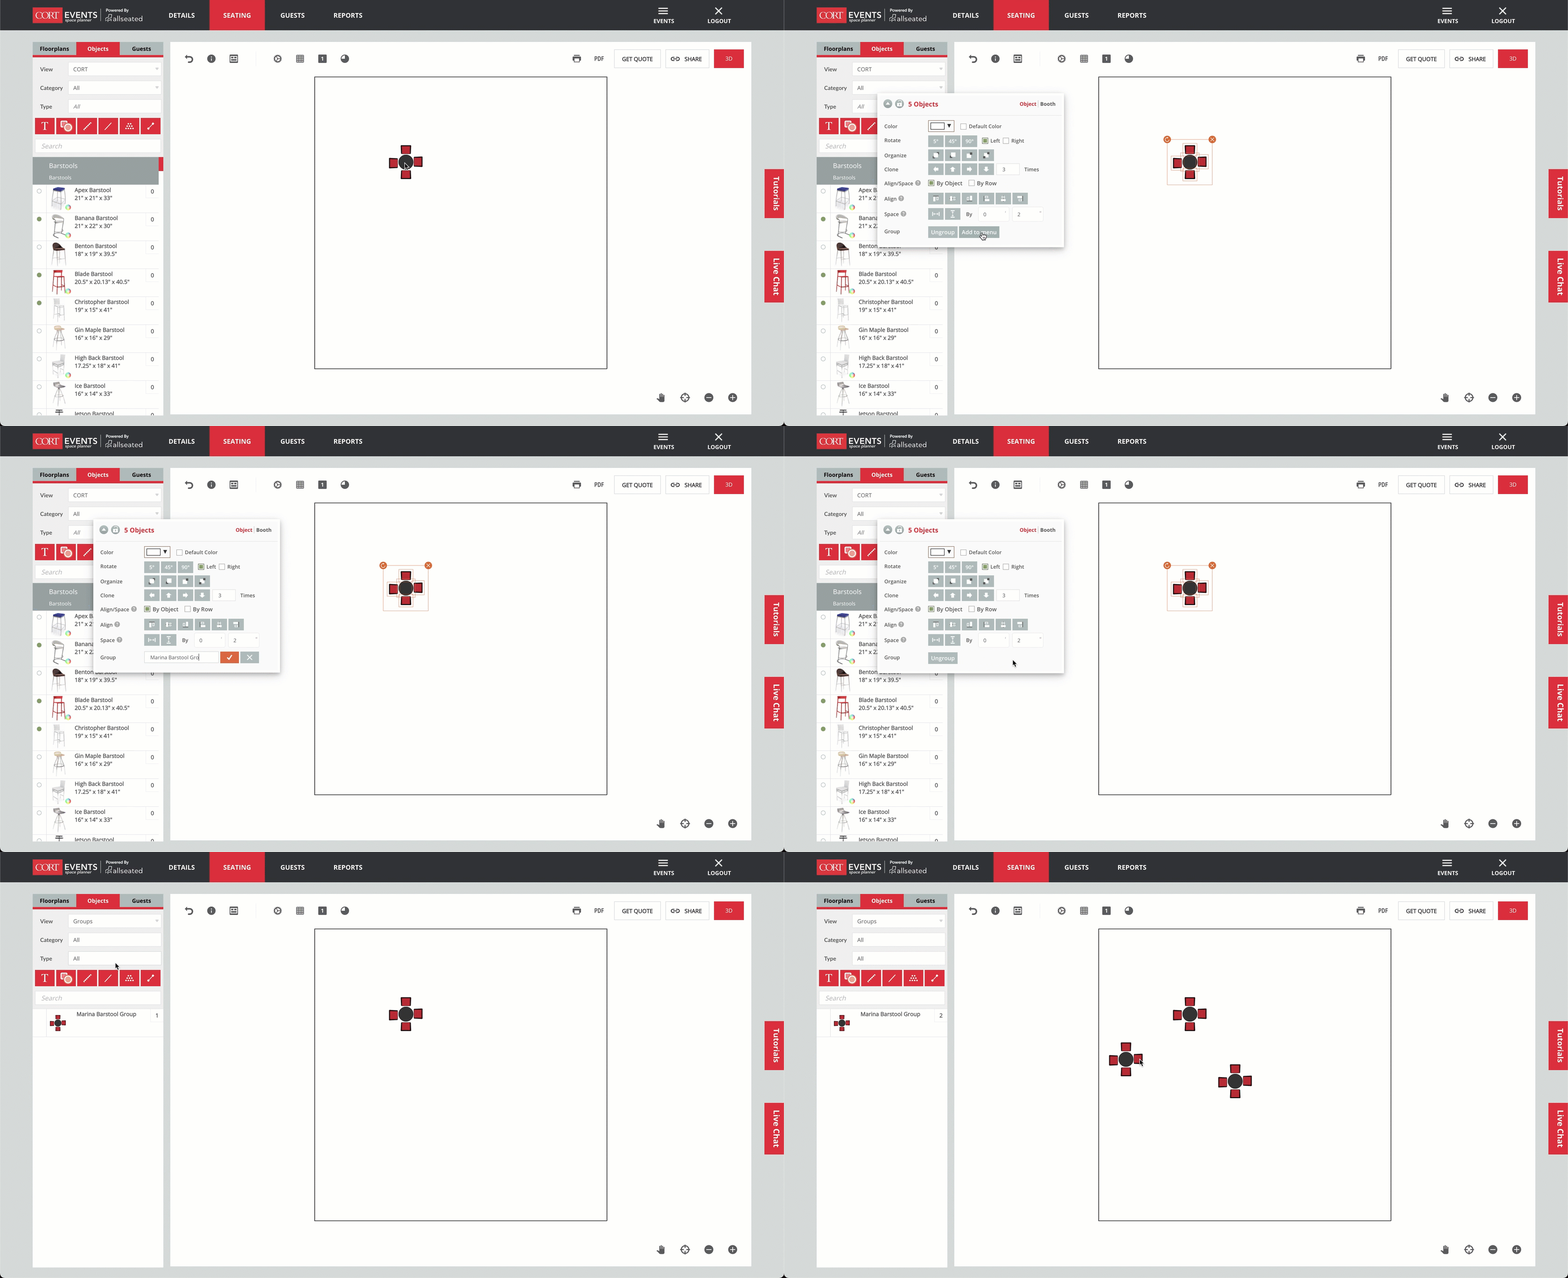
3. You can now move or clone the group of products as if it were one object.

4. Select Add to menu next in the product menu if you want to use this group of products in other plans.

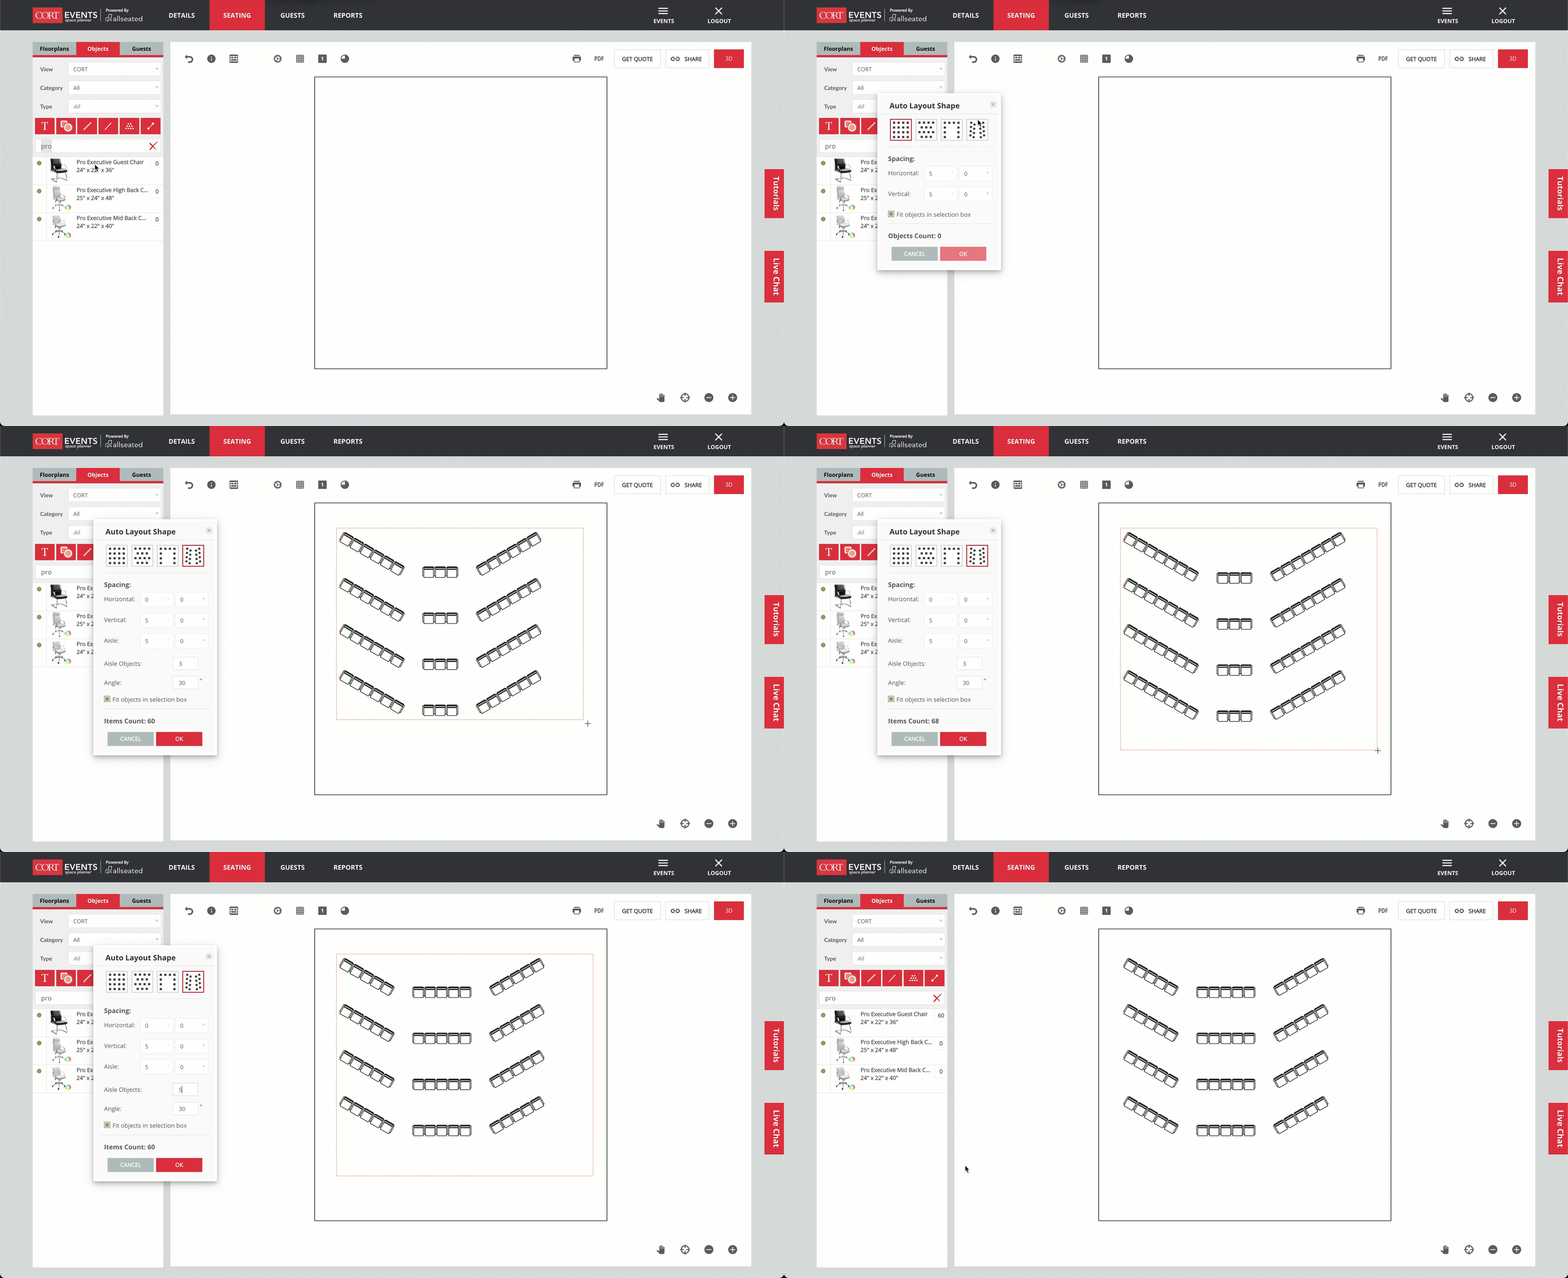
Using Auto Layouts
1. In the Objects menu, hover over product.
2. Click on the layout icon in bottom right.
3. Choose a layout shape.
4. Adjust spacing numbers as needed.
5. In the floor plan, click and drag cursor over area you want products.
6. You can still change the shape and spacing of your layout until you click OK in the menu.

Viewing in 3D
1. Click on 3D.
2. By default, you will be in a birds eye view.
3. Click on the person icon to for a first person view.
4. Navigate around the room using controls in bottom right
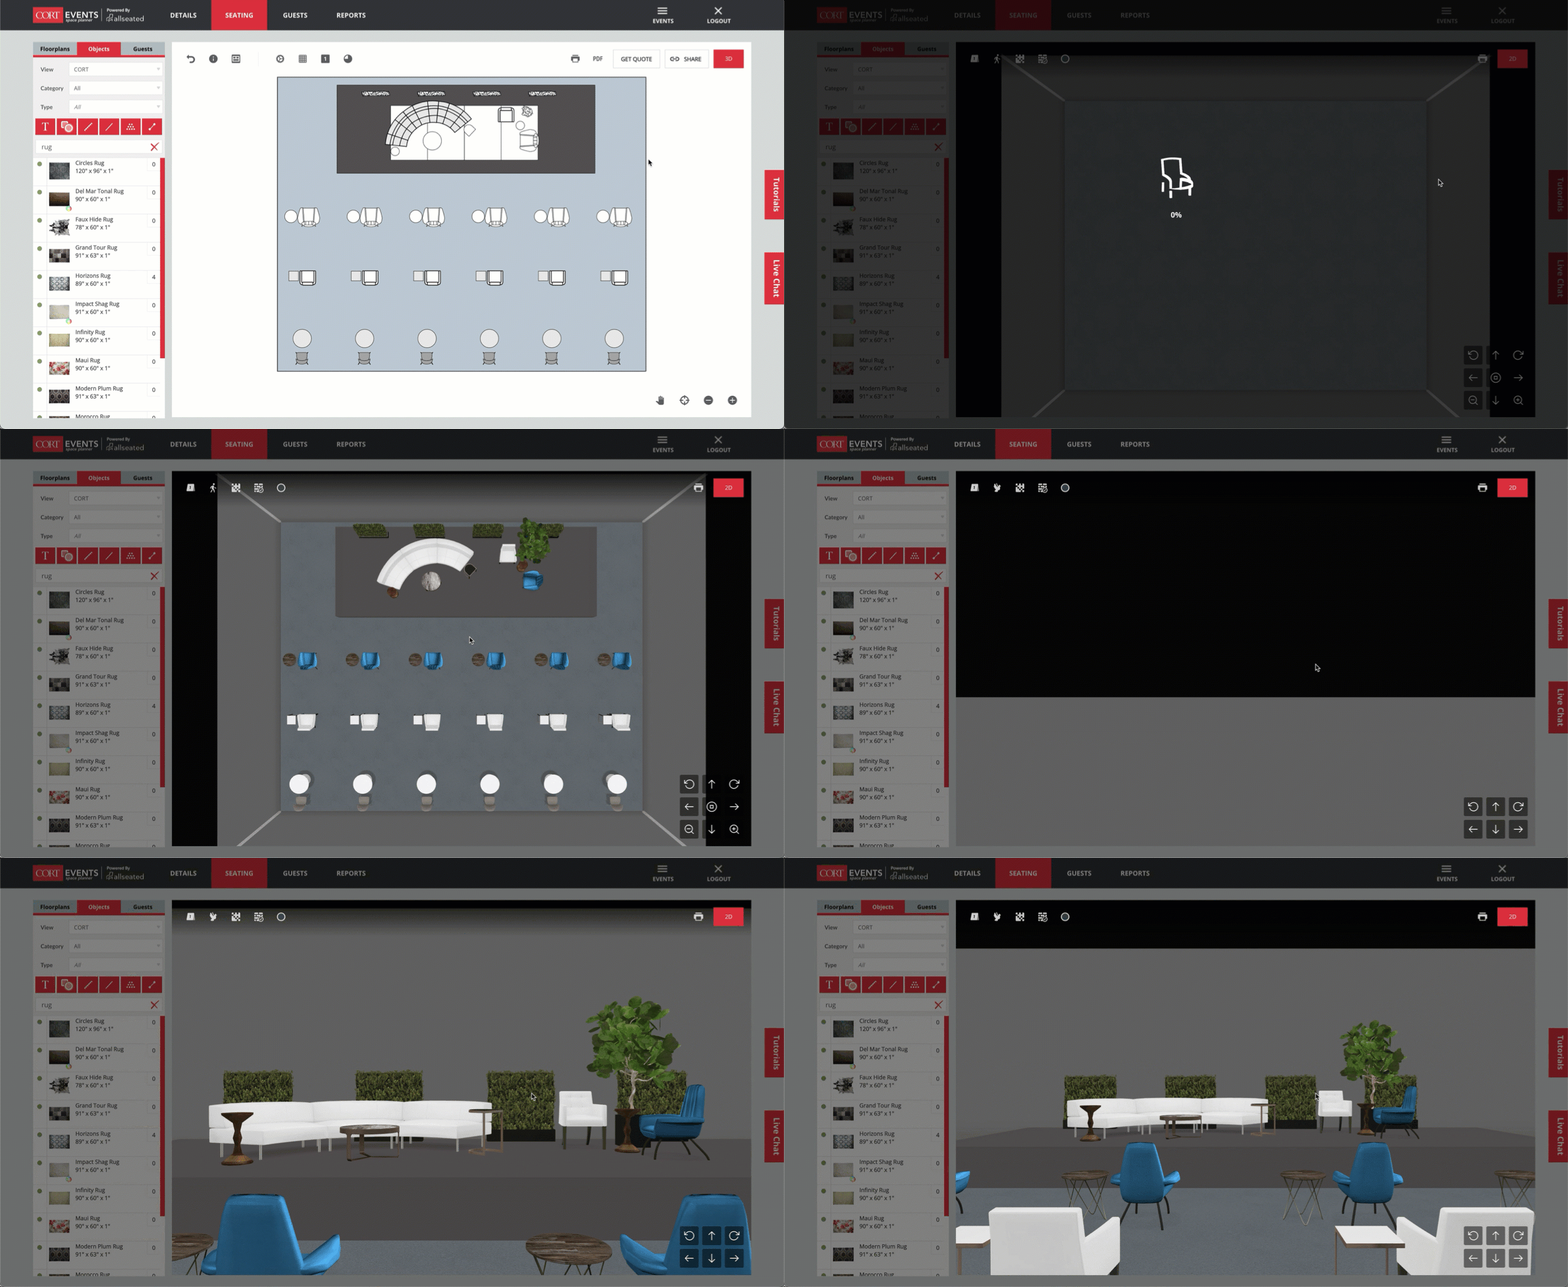

5. You can also navigate and view room at angles by starting in birds eye and using your mouse or the zoom button to zoom in.
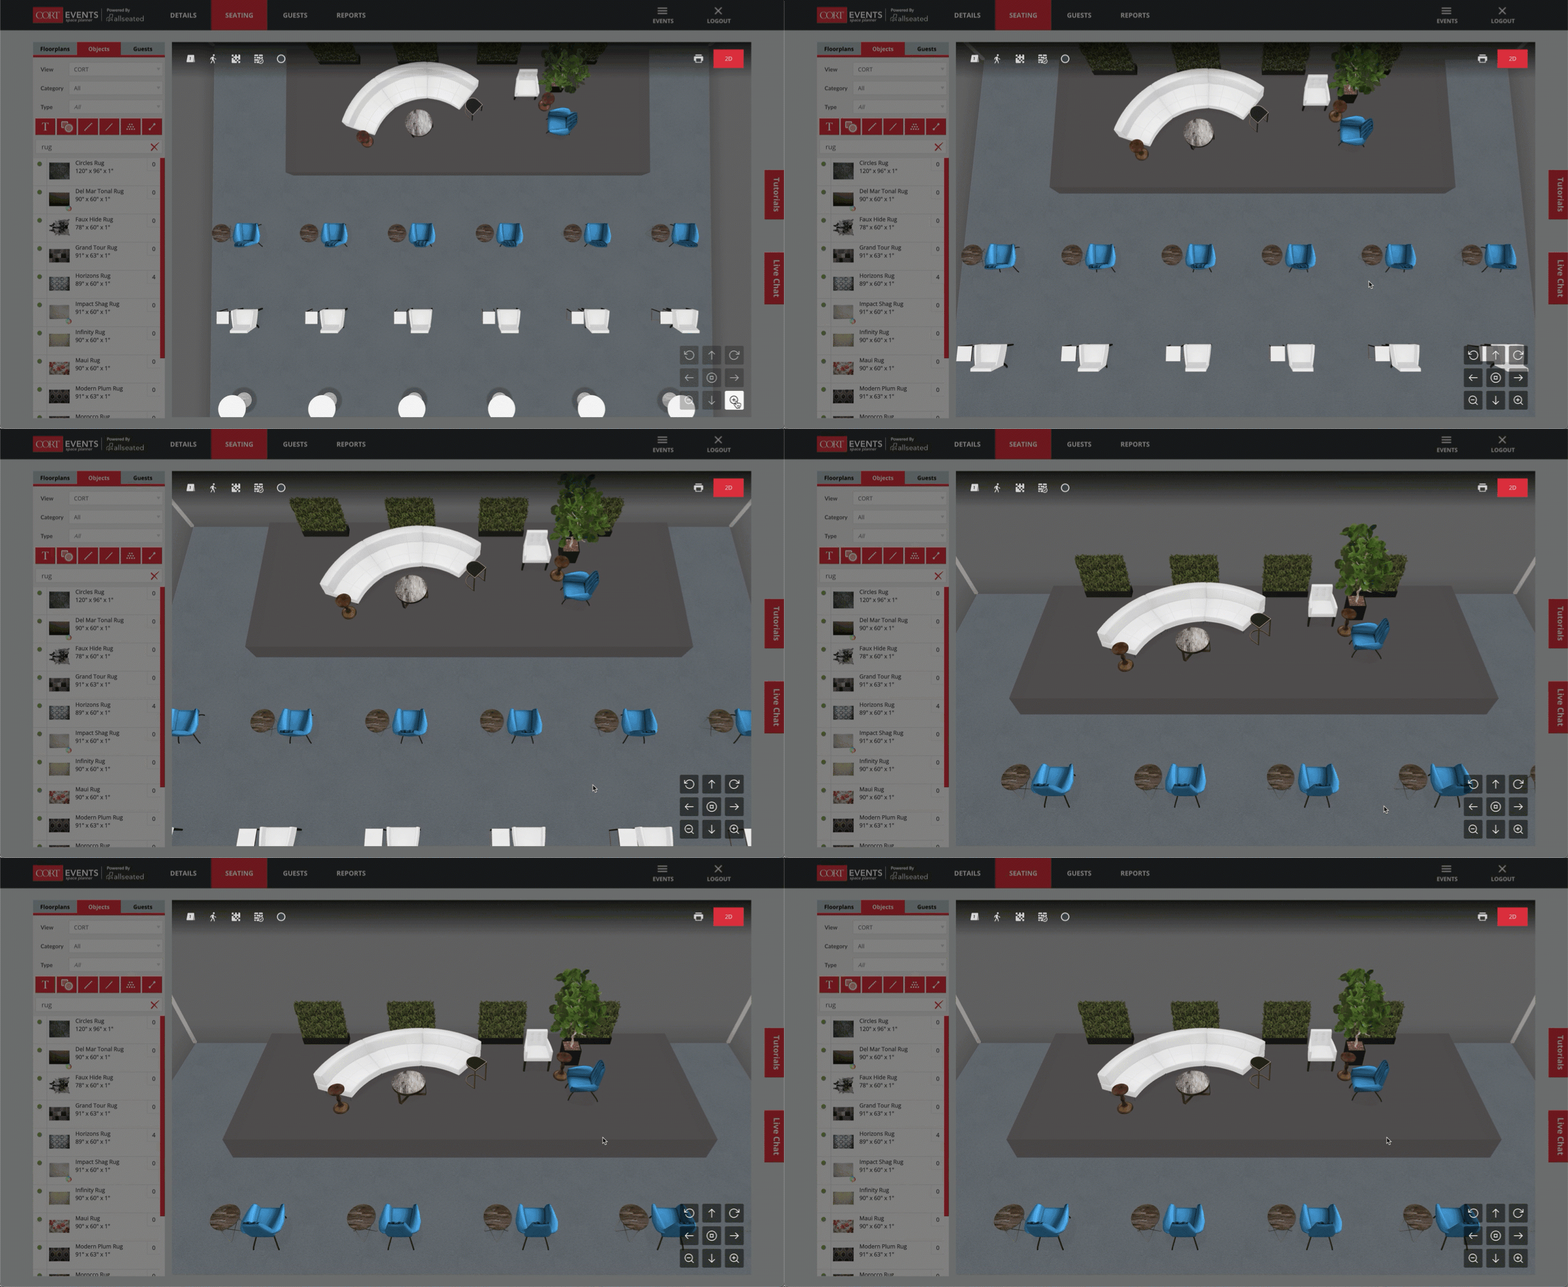

*You can share 3D view by taking screenshots or creating a shareable link.
Collaborating
In this section, you will learn how to create a public link to share with your team and collaborate in real time and how to add collaborators to help you edit and design your floor plans.
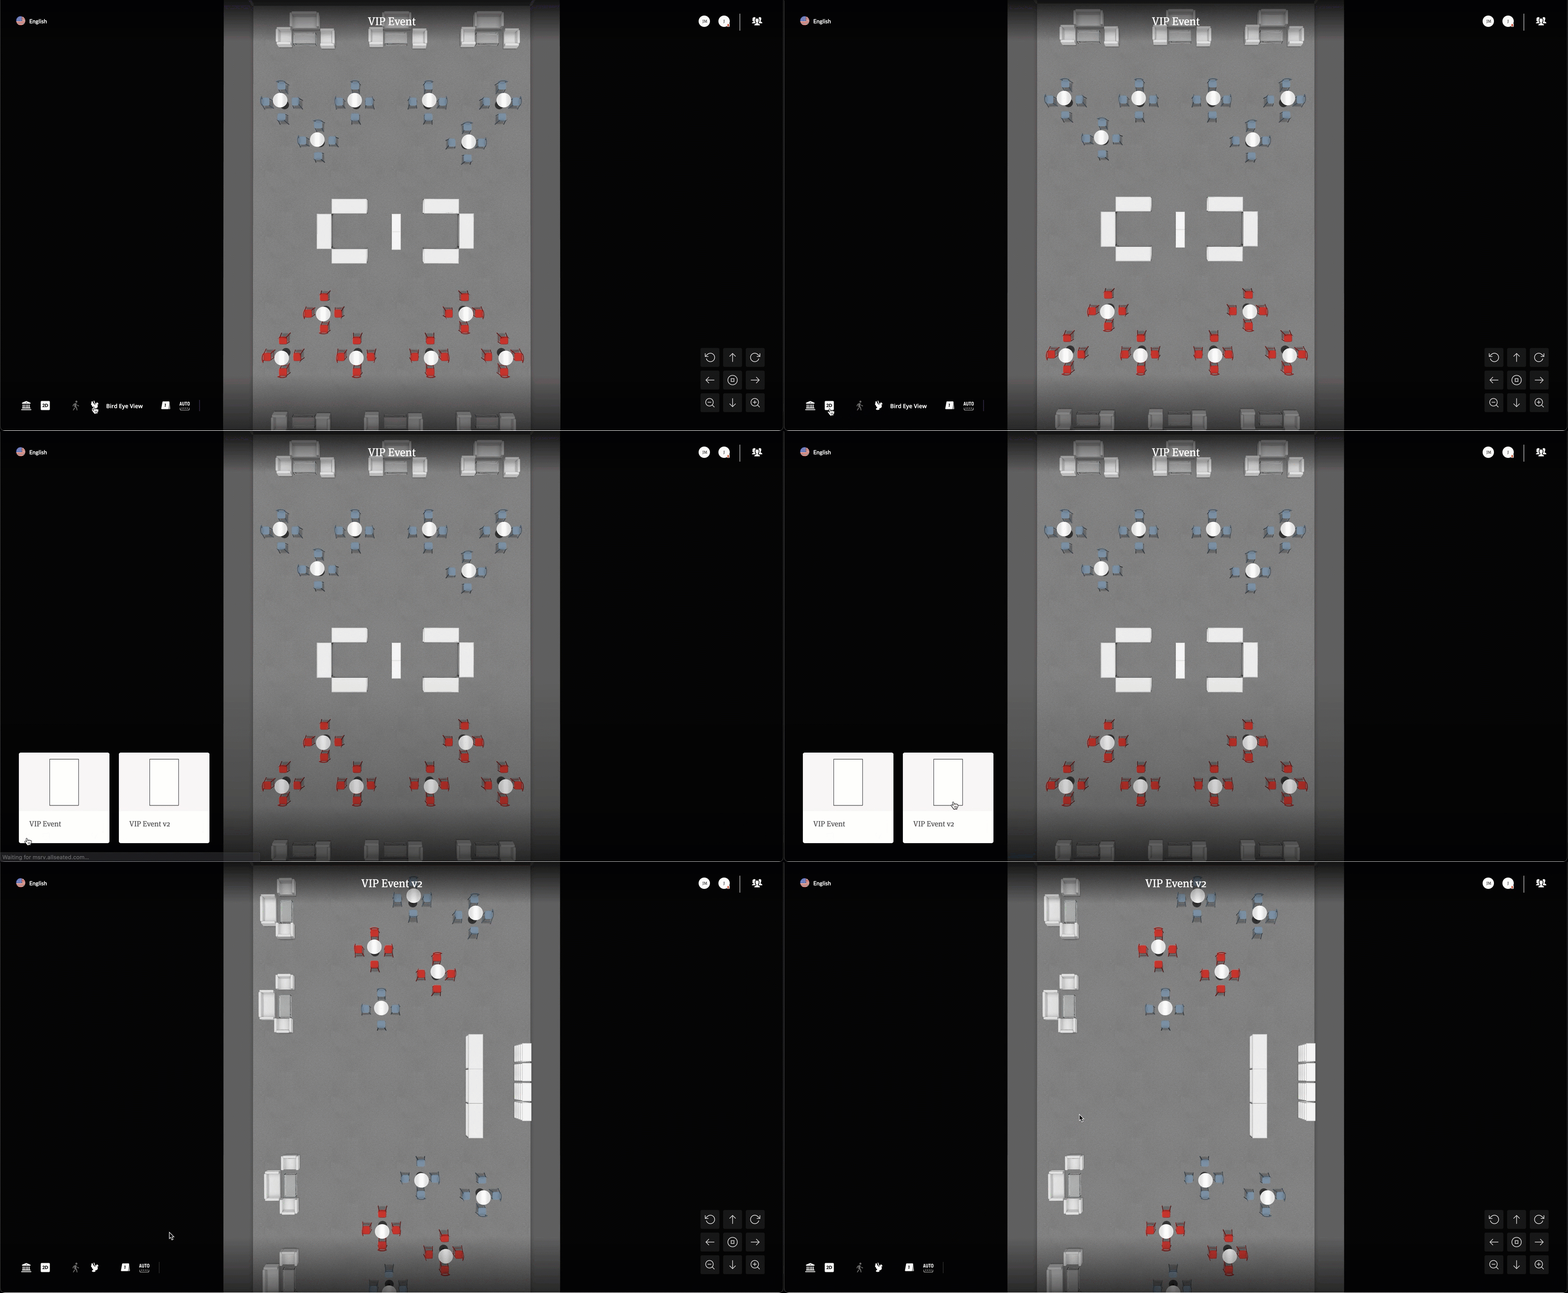
Creating Shareable Link
Easily share your floorplan in 3D by creating a shareable link.
1. Click on Share.
2. Click on Turn On.
3. Copy Link.
4. Share link with client.
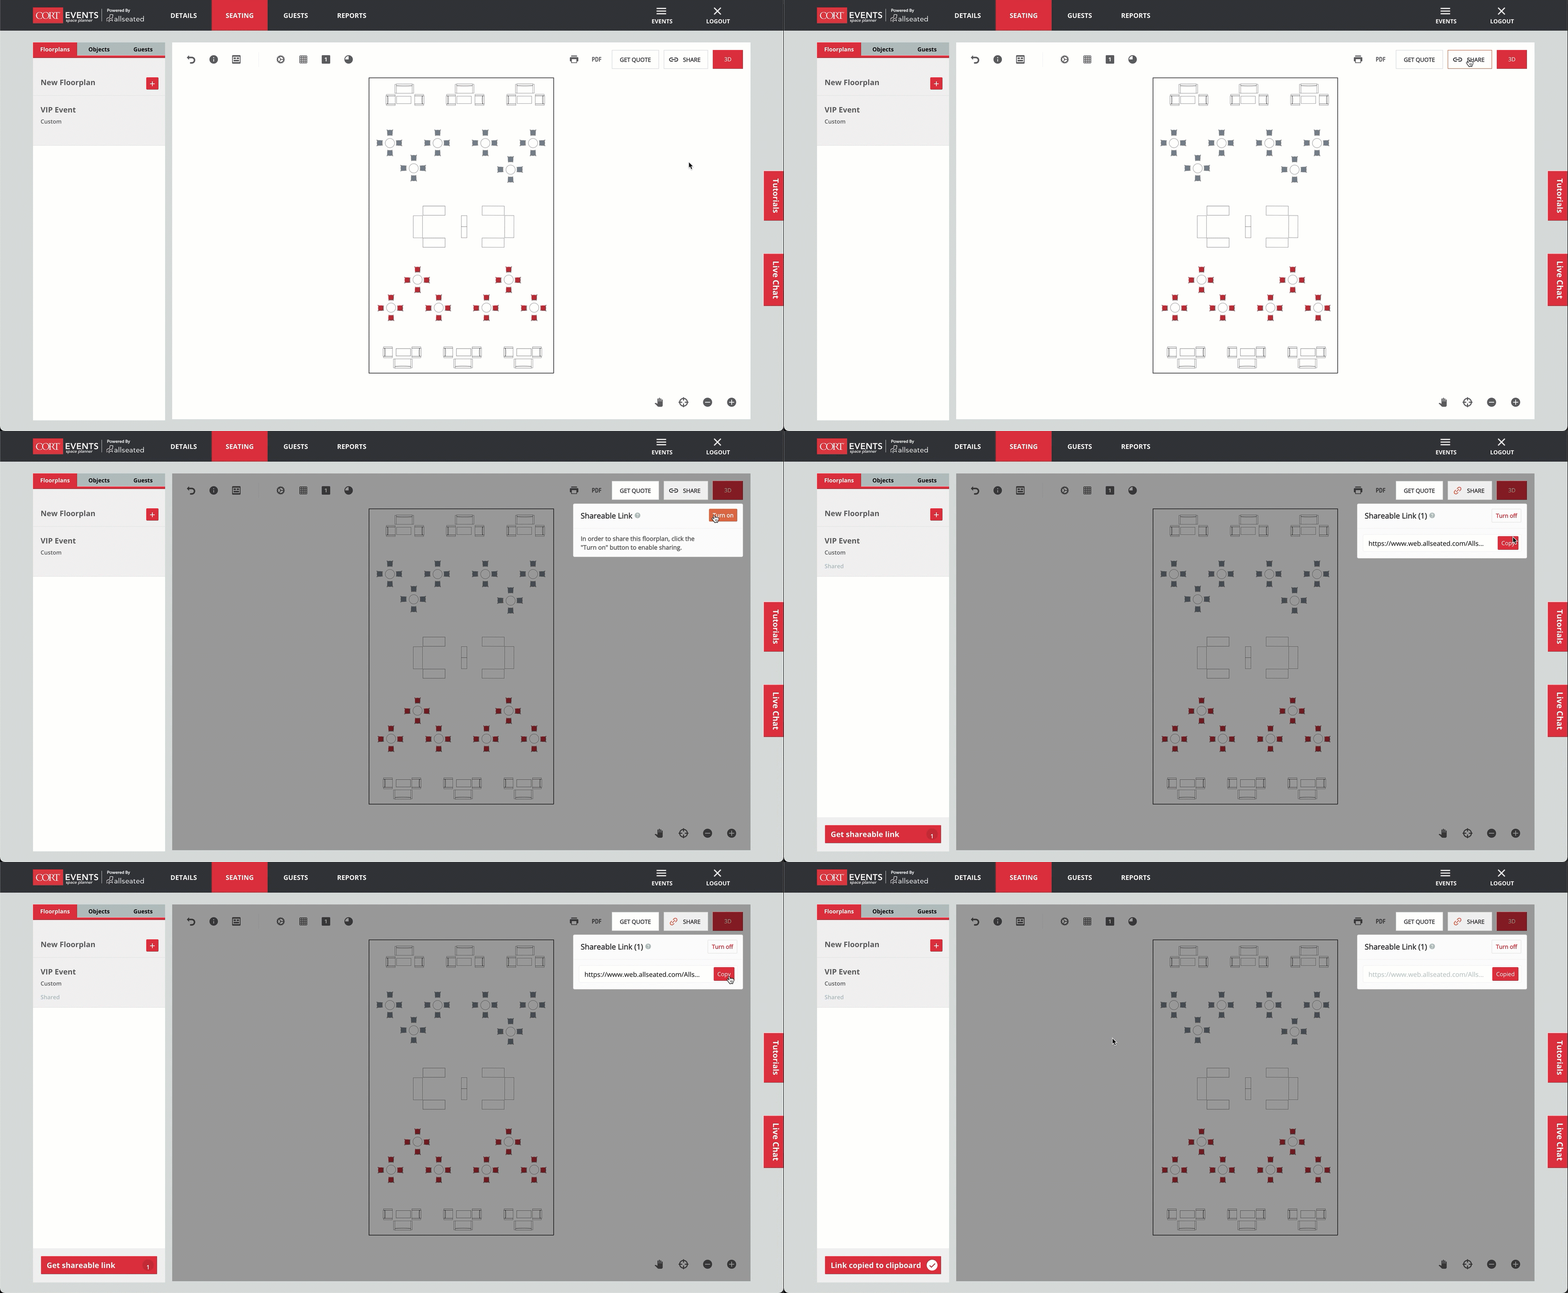

Once sharing is turned on, you can remove or add additional floor plans from your event.
5. Under Floorplans, hover over the floorplan you want to add/remove.
6. Click on the “–“ icon to Stop Sharing.
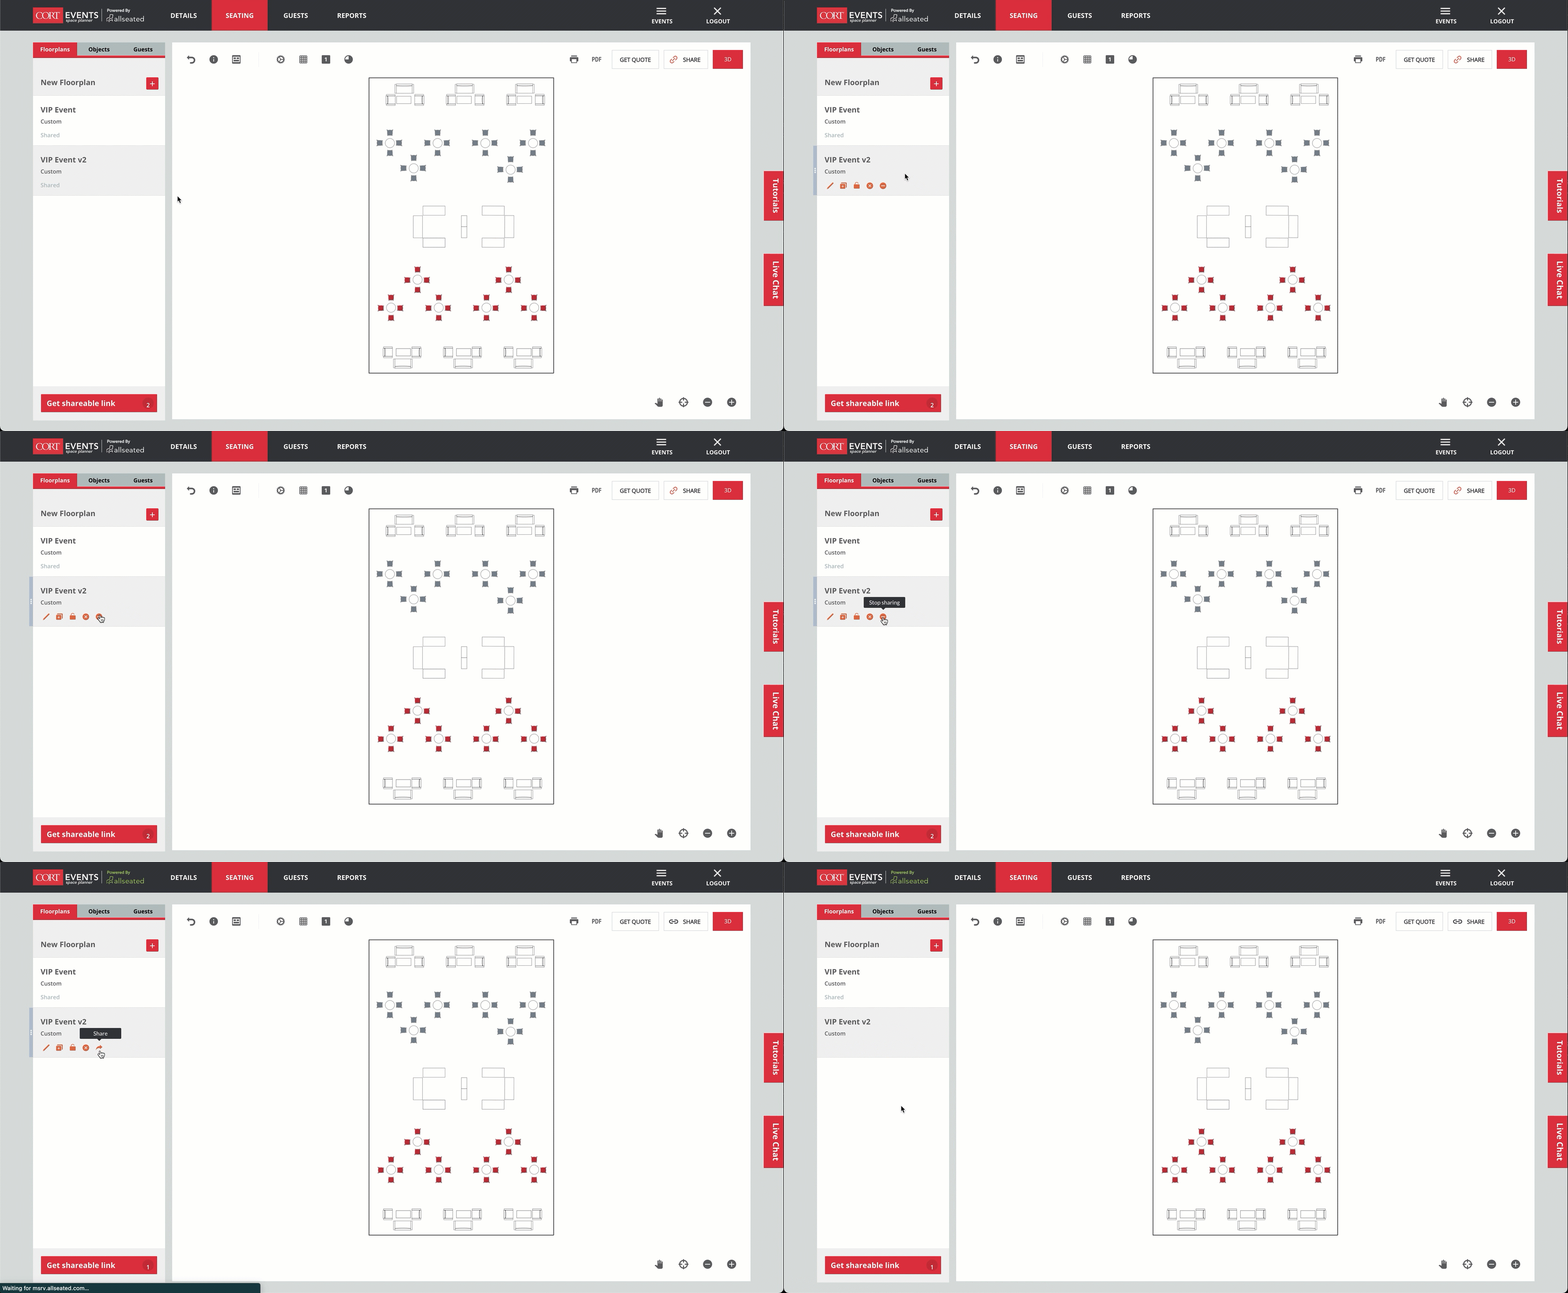

7. Click on the forward icon to Share.
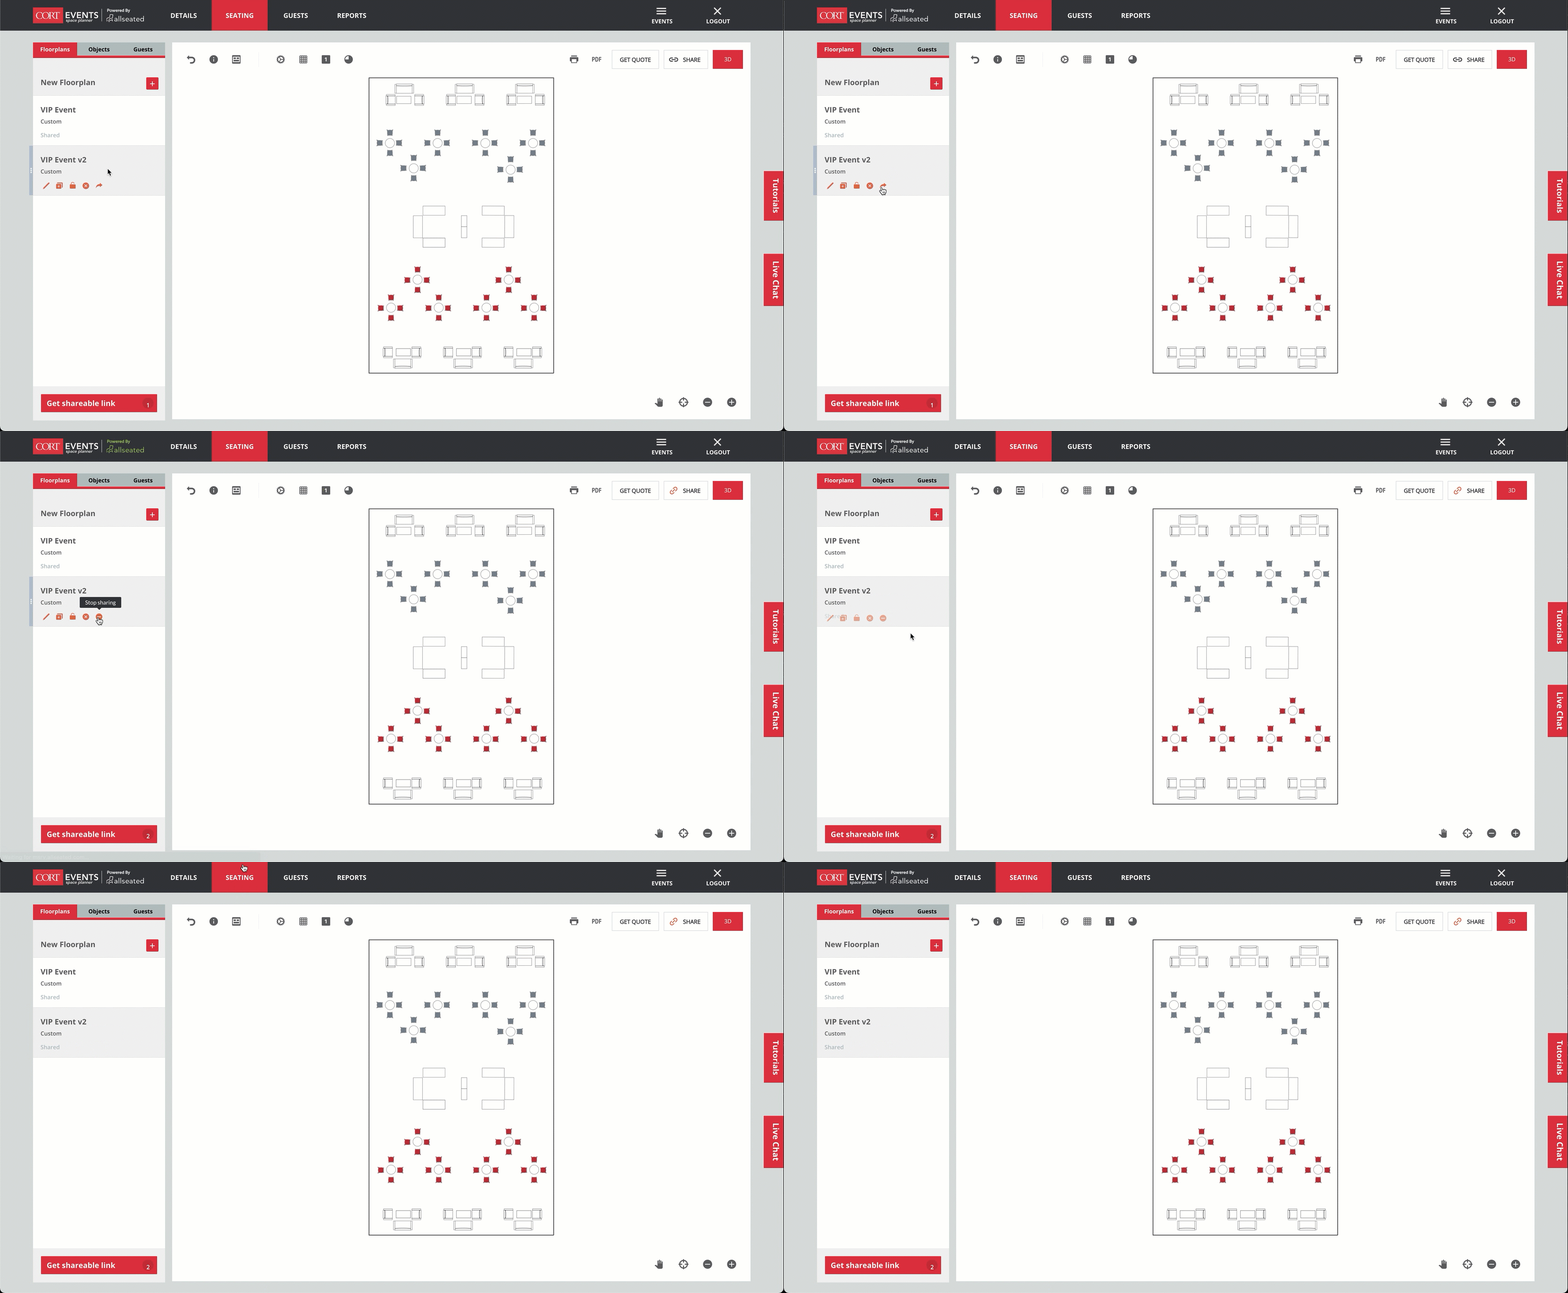

4. Client can navigate between the different floorplans by clicking on the venue icon in the bottom left.

Adding Collaborators
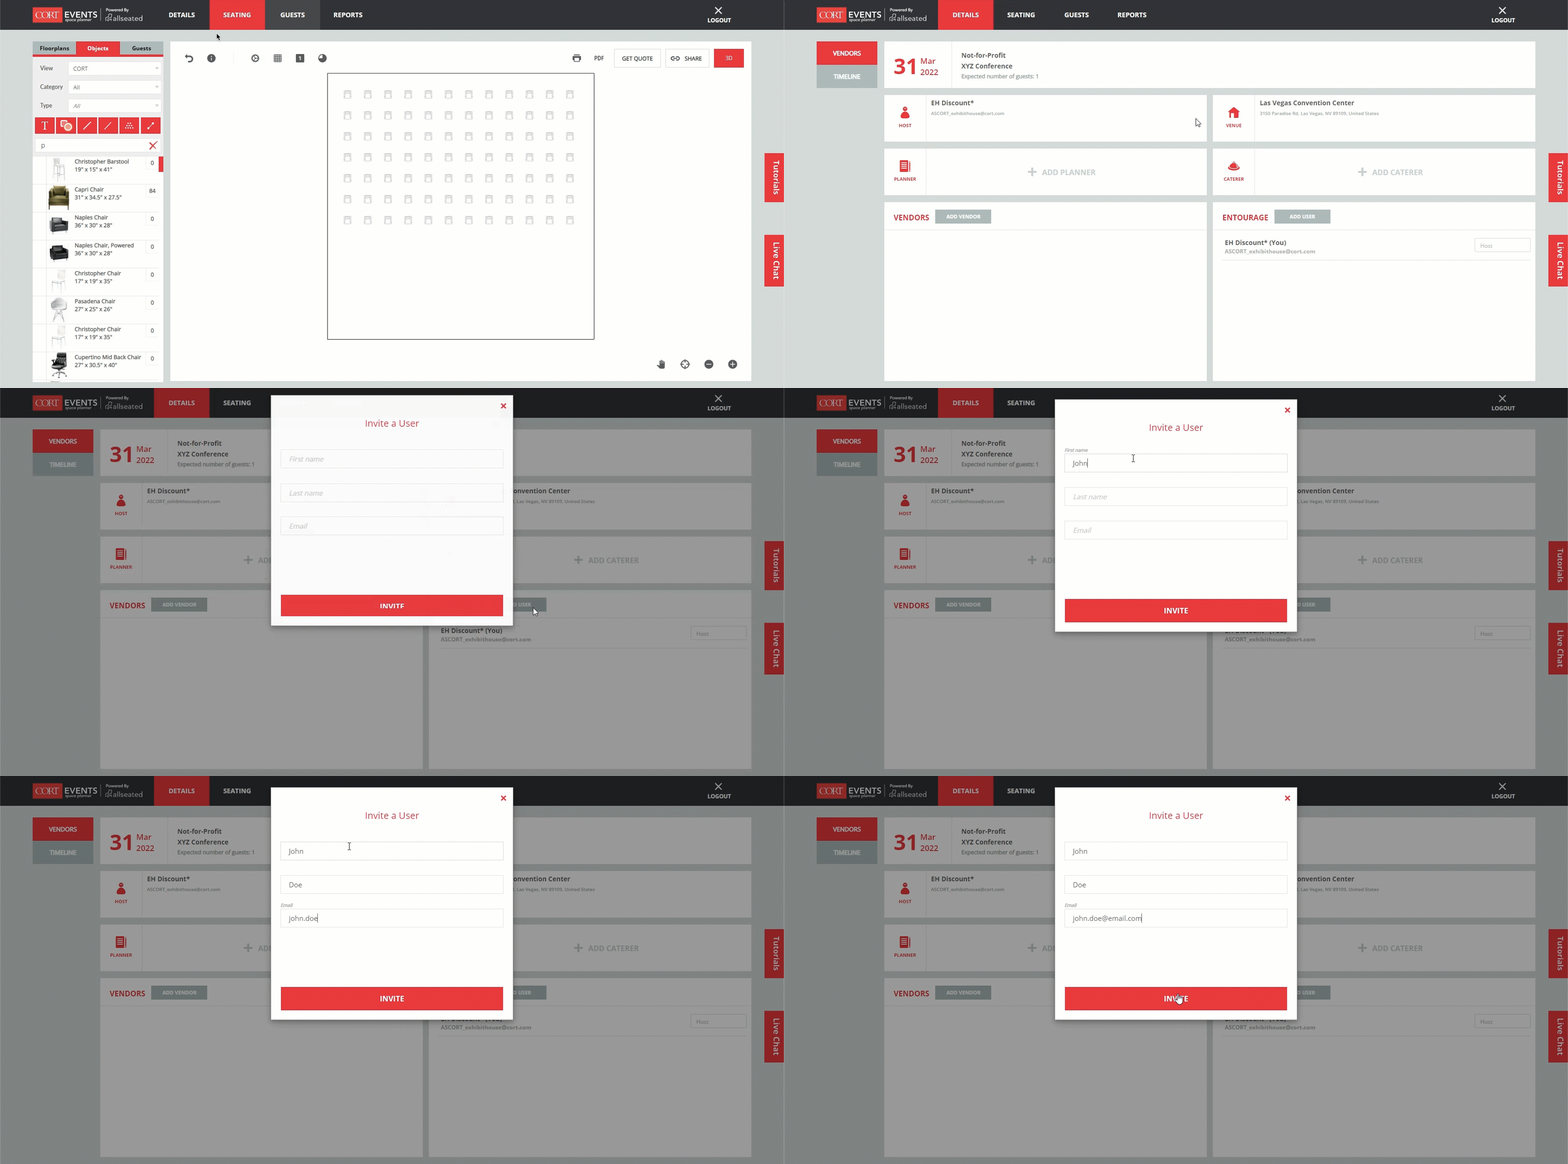
You can invite clients or partners to your event to help edit your floorplans.
1. Click on the Details tab.
2. Add users to Entourage, Vendors or Planners.
3. Users will receive an email invitation to access the floor plan.
*Only one user can edit the floor plan at a time. Once that user logs out, another can take over editing.

Sharing with CORT
In this section you will learn how you can add CORT to your event as a collaborator, export a product list to email directly to your CORT representative and how to send products in your plan directly to your cortevents.com cart to quickly request a quote.
Inviting CORT
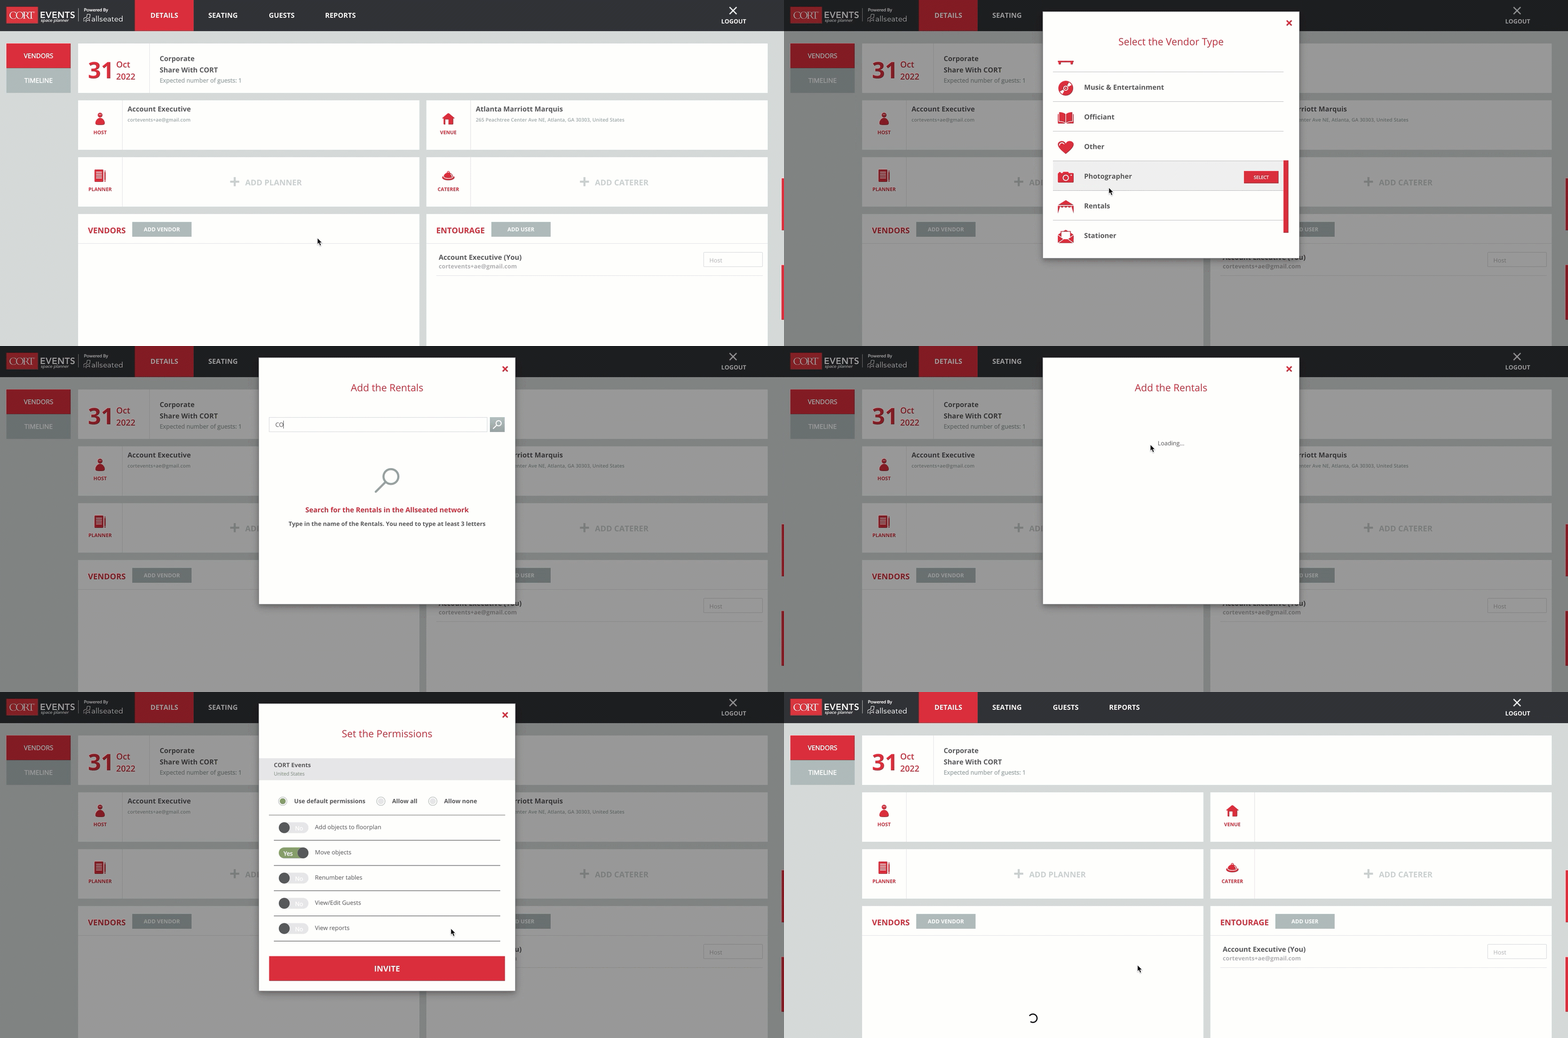
Invite CORT to your event and your CORT representative can access your plan for design assistance and/or delivery set up reference.
1. Click on the Details tab.
2. Under Vendors, click on Add Vendor.
3. Select Rentals.
4. Search for CORT Events.
5. Select the first CORT Events.
6. Choose the permissions you want CORT to have.
7. Click on Invite.

Exporting the Product List
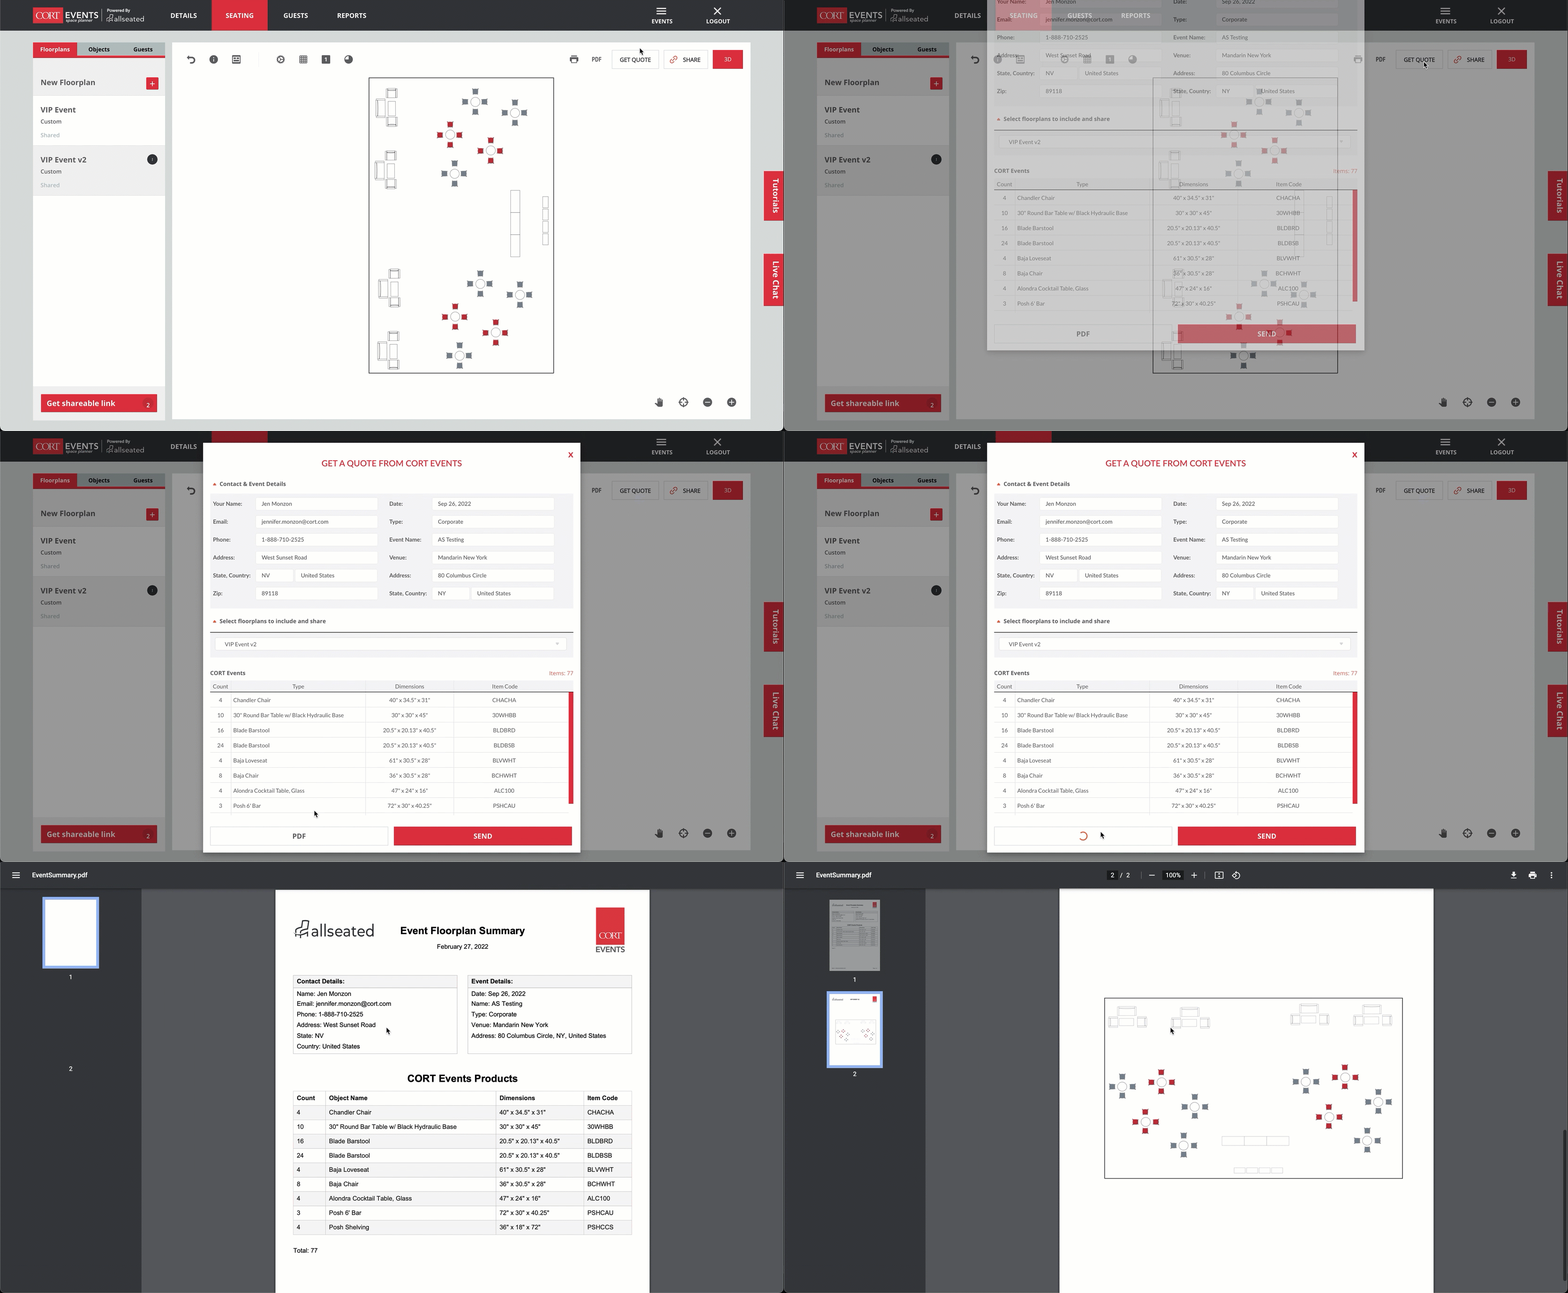
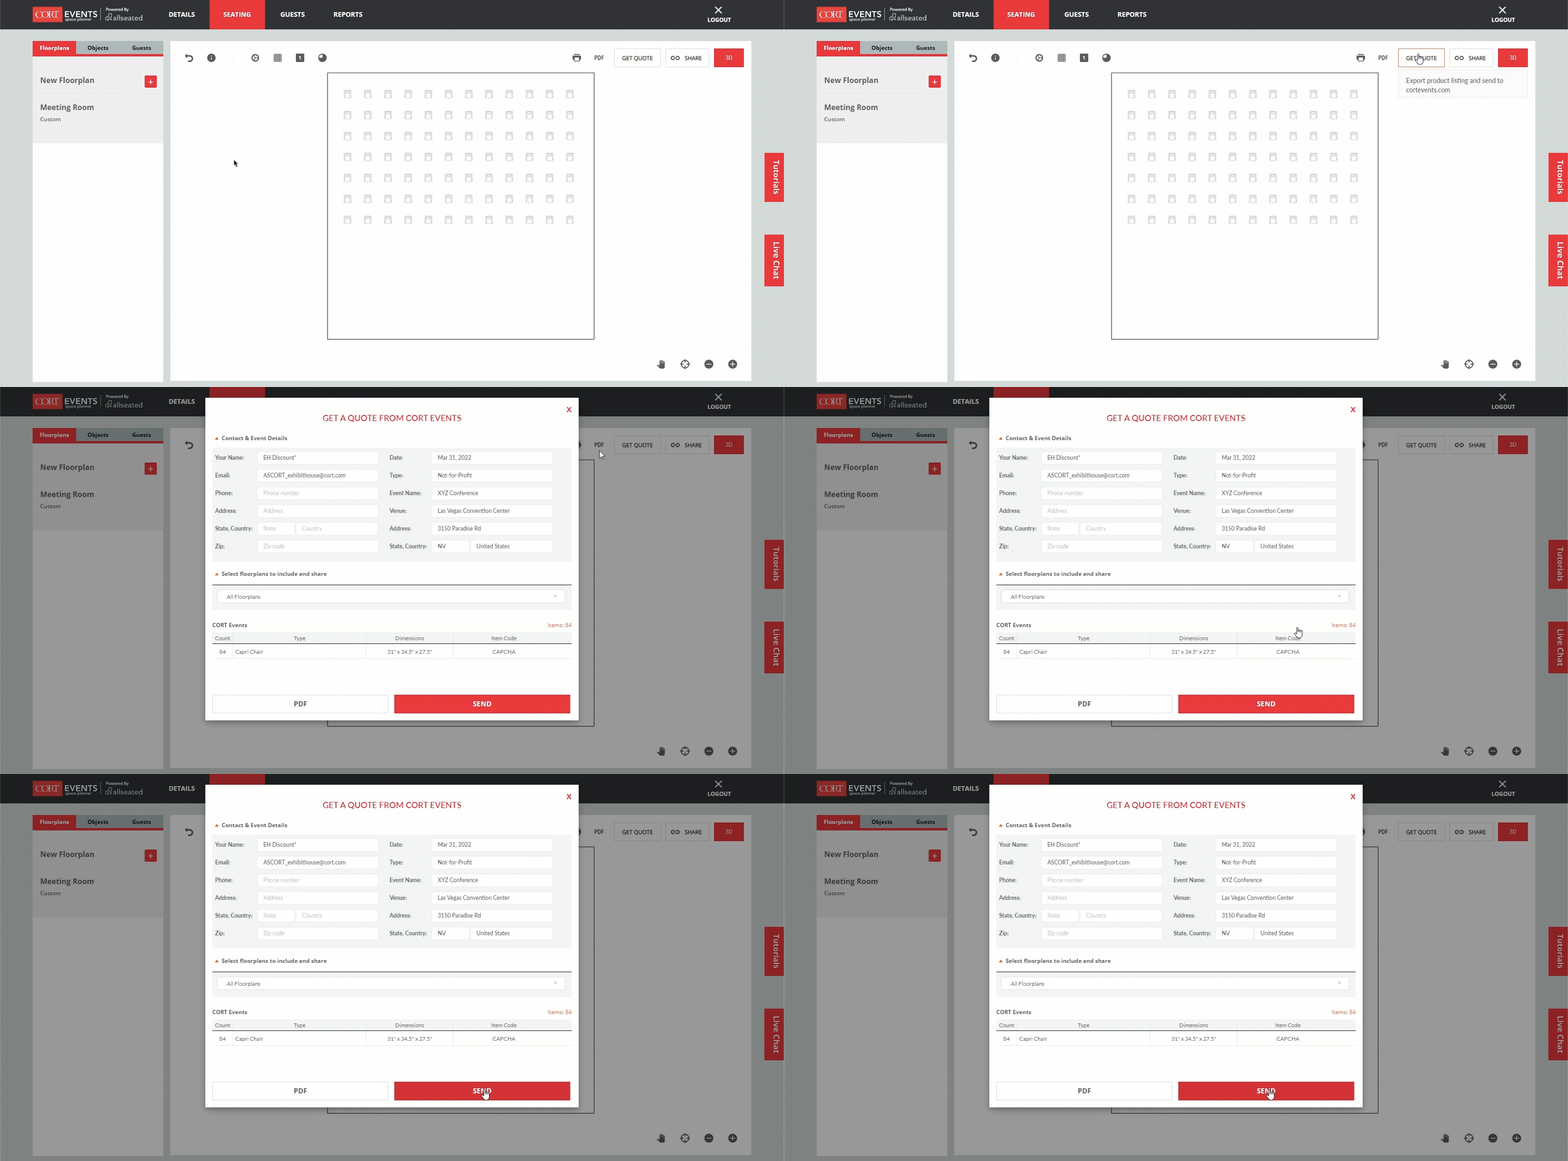
You can export a pdf file that includes all CORT products in your floor plan(s) and a 2D view.
1. Click on Get Quote.
2. Choose the correct floor plan(s).
3. Click on PDF.

Sending Products to Cart
Once you’ve completed your floor plan, you can easily send all products used to your cortevents.com cart to request your quote or place your order.
1. Click on Get Quote*.
2. Click on Send – This action will replace anything in your cortevents.com cart.
3. You will be redirected to cortevents.com.
4. Click on Request A Quote or Proceed to Checkout.
5. Complete event details to request quote.
6. A CORT representative will reach out to you within 2-3 business days.
*This does not refer to the Quotes within CORT Events Premier.

Still Need Help?
-
Feel free to contact us to request a one-on-one demo. You can also reach out directly to your CORT sales representative.
-
Our space planner powered by AllSeated includes a direct line to the AllSeated team via Live Chat. Once in the planner, click on Live Chat on the right side of your screen for assistance.
-
View more tutorials from AllSeated here.
